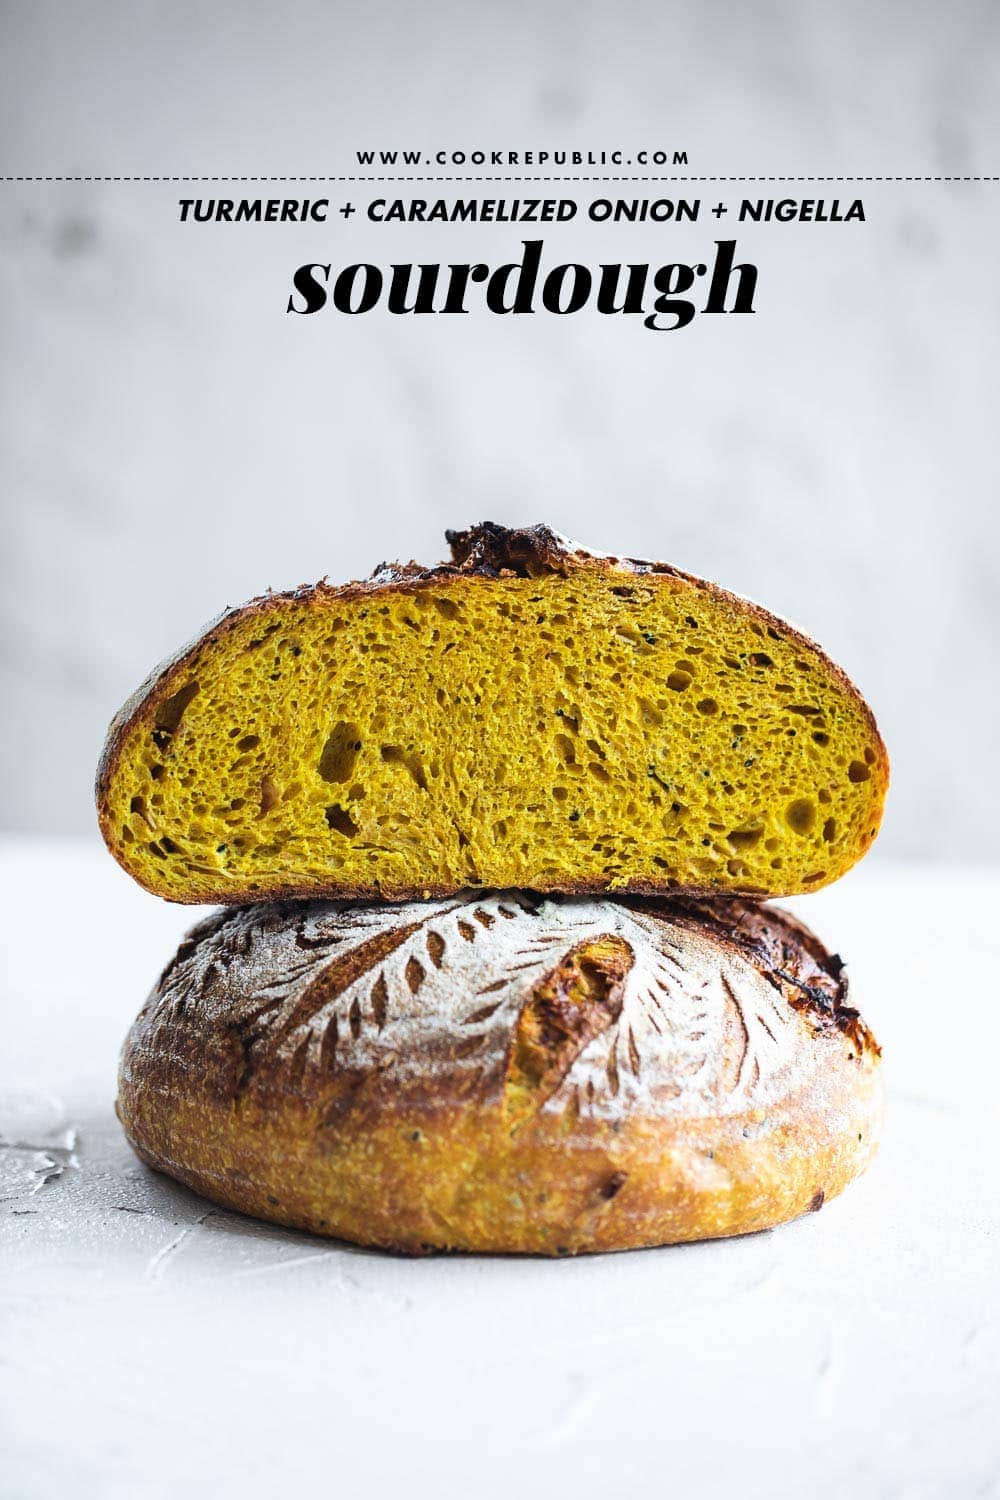
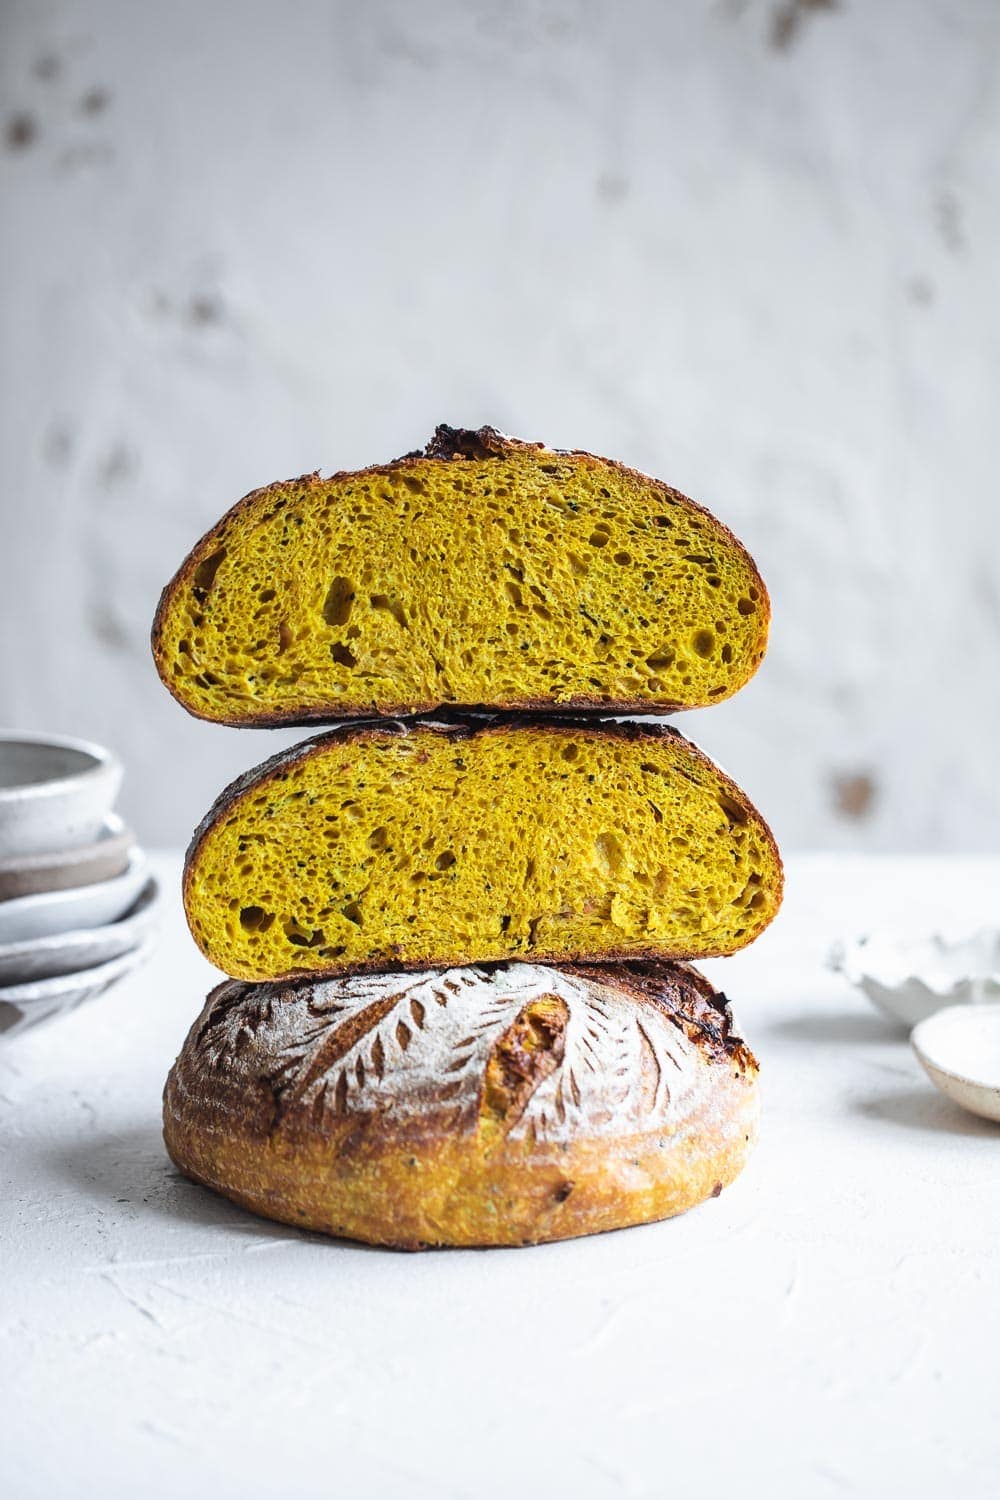
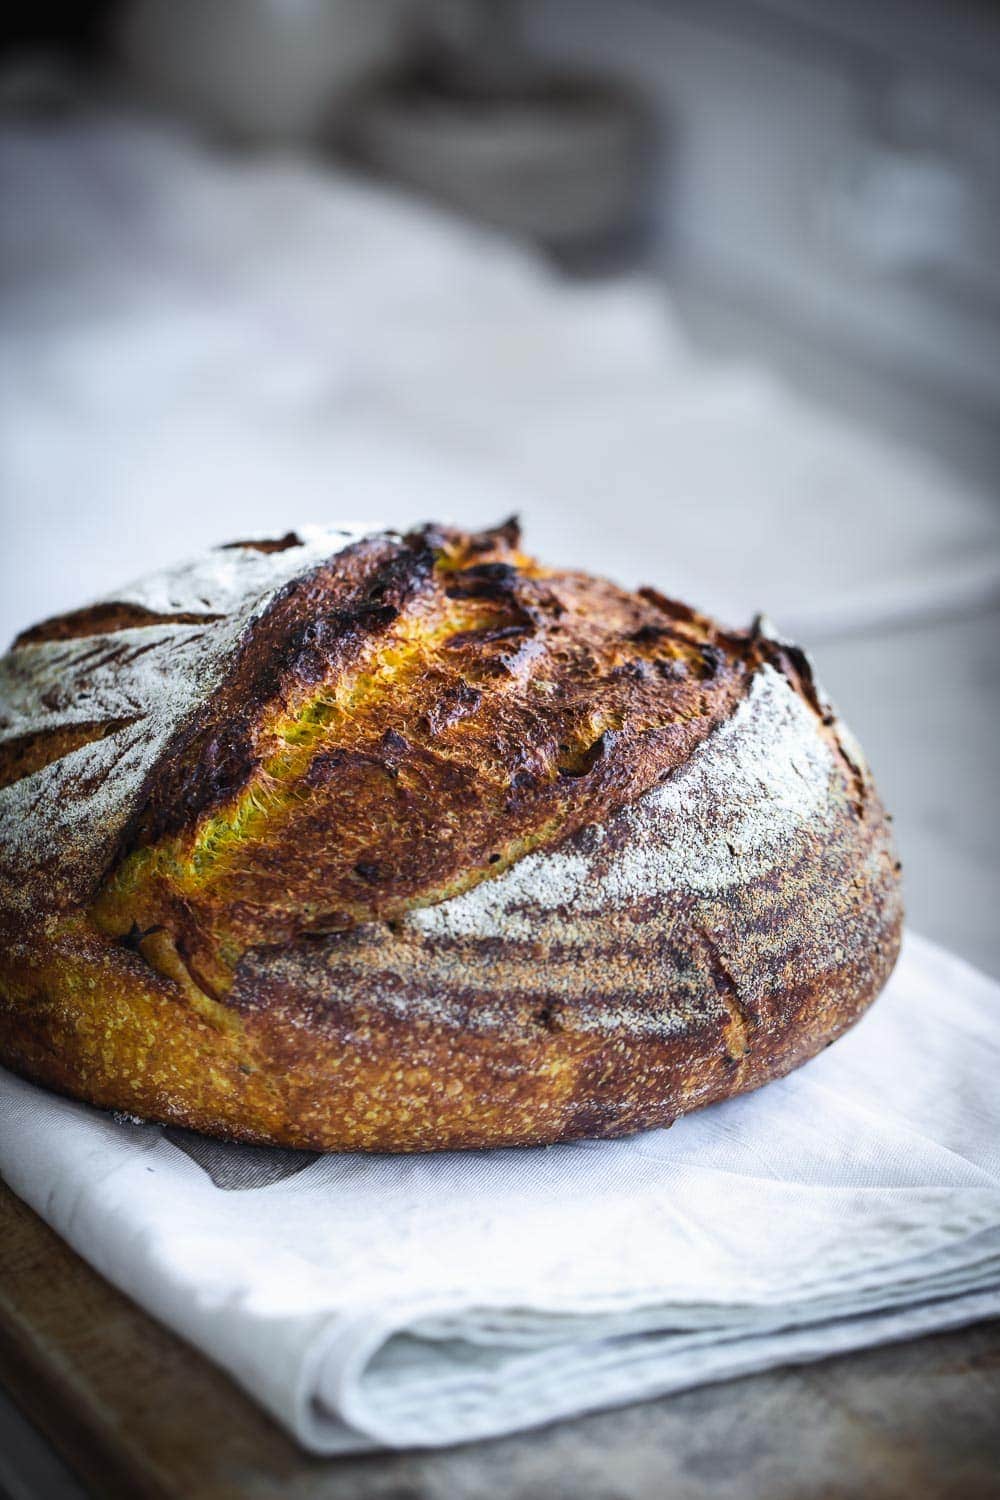
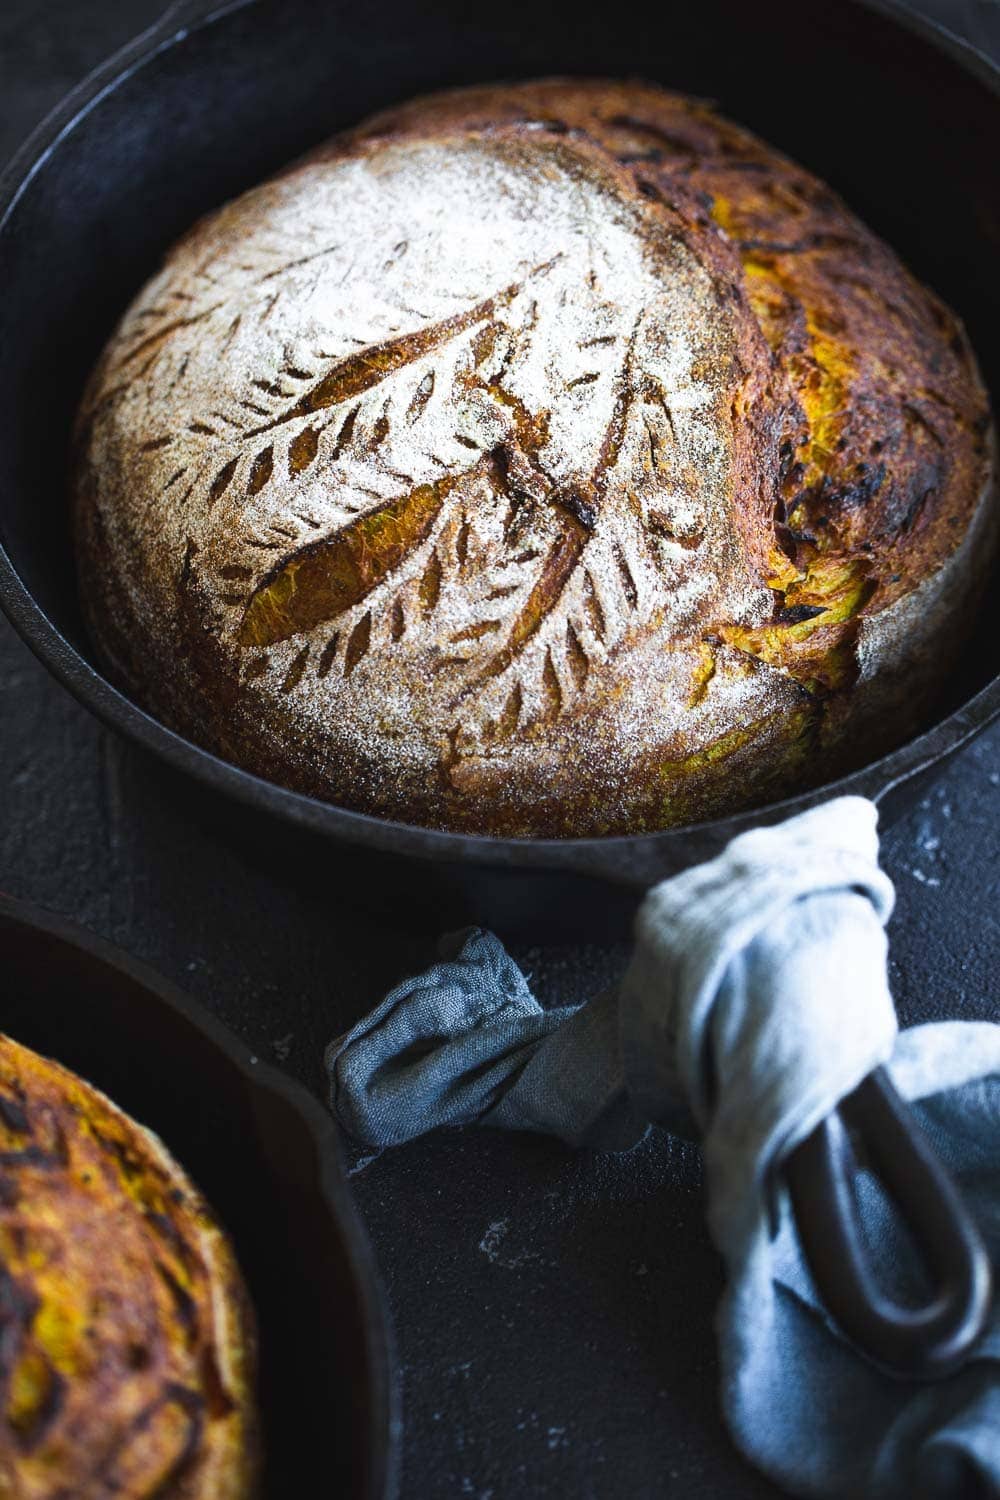
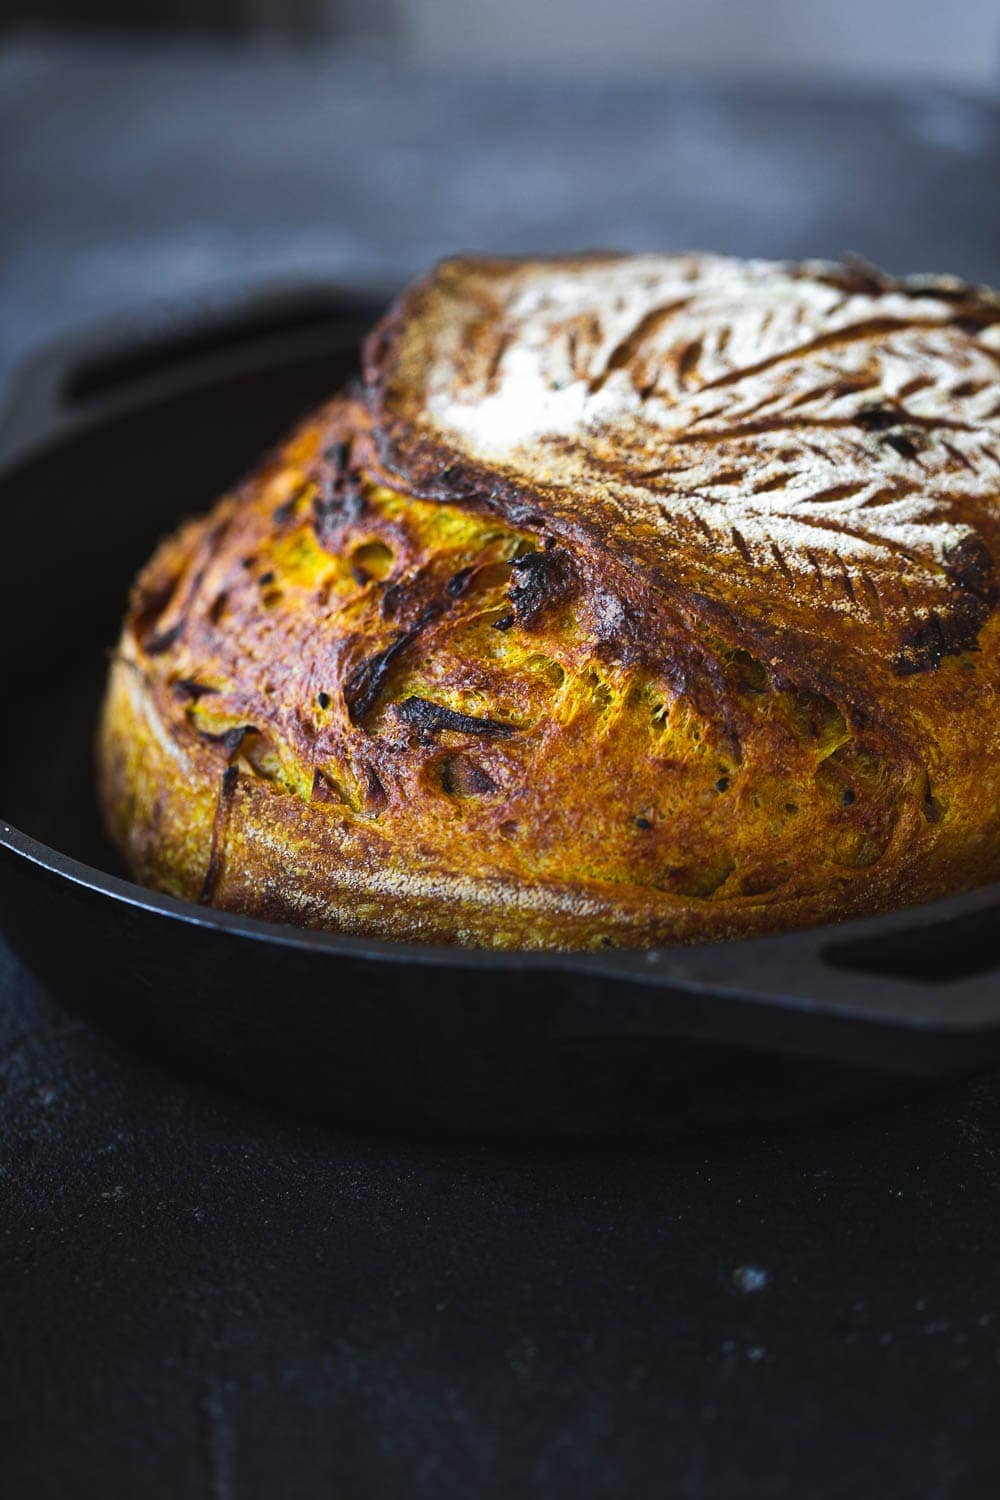
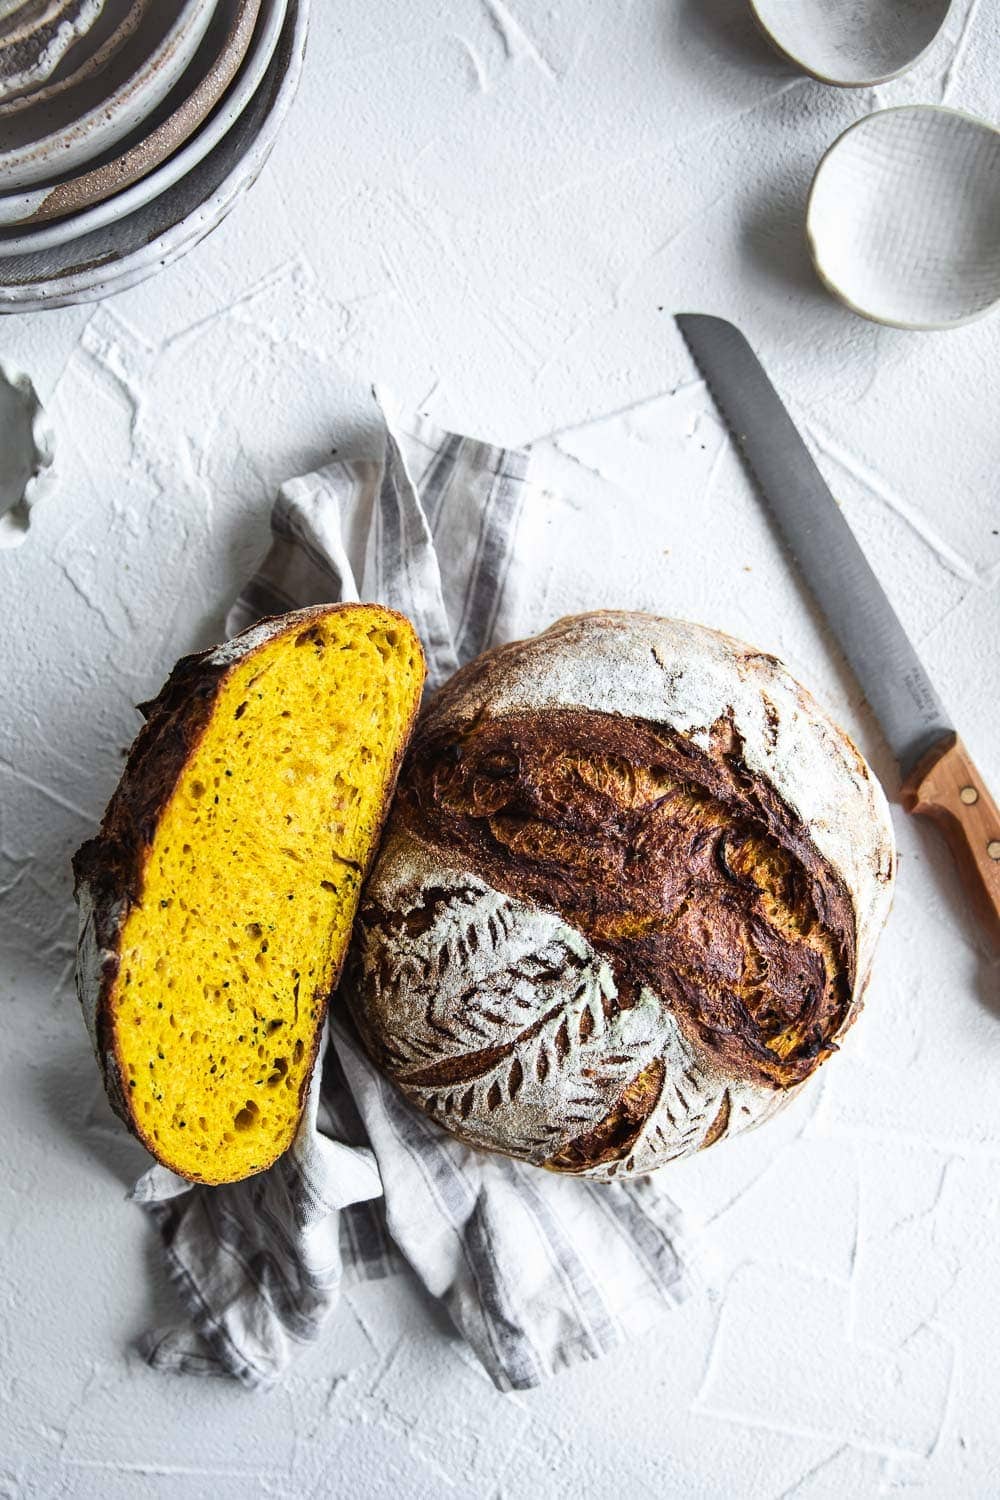
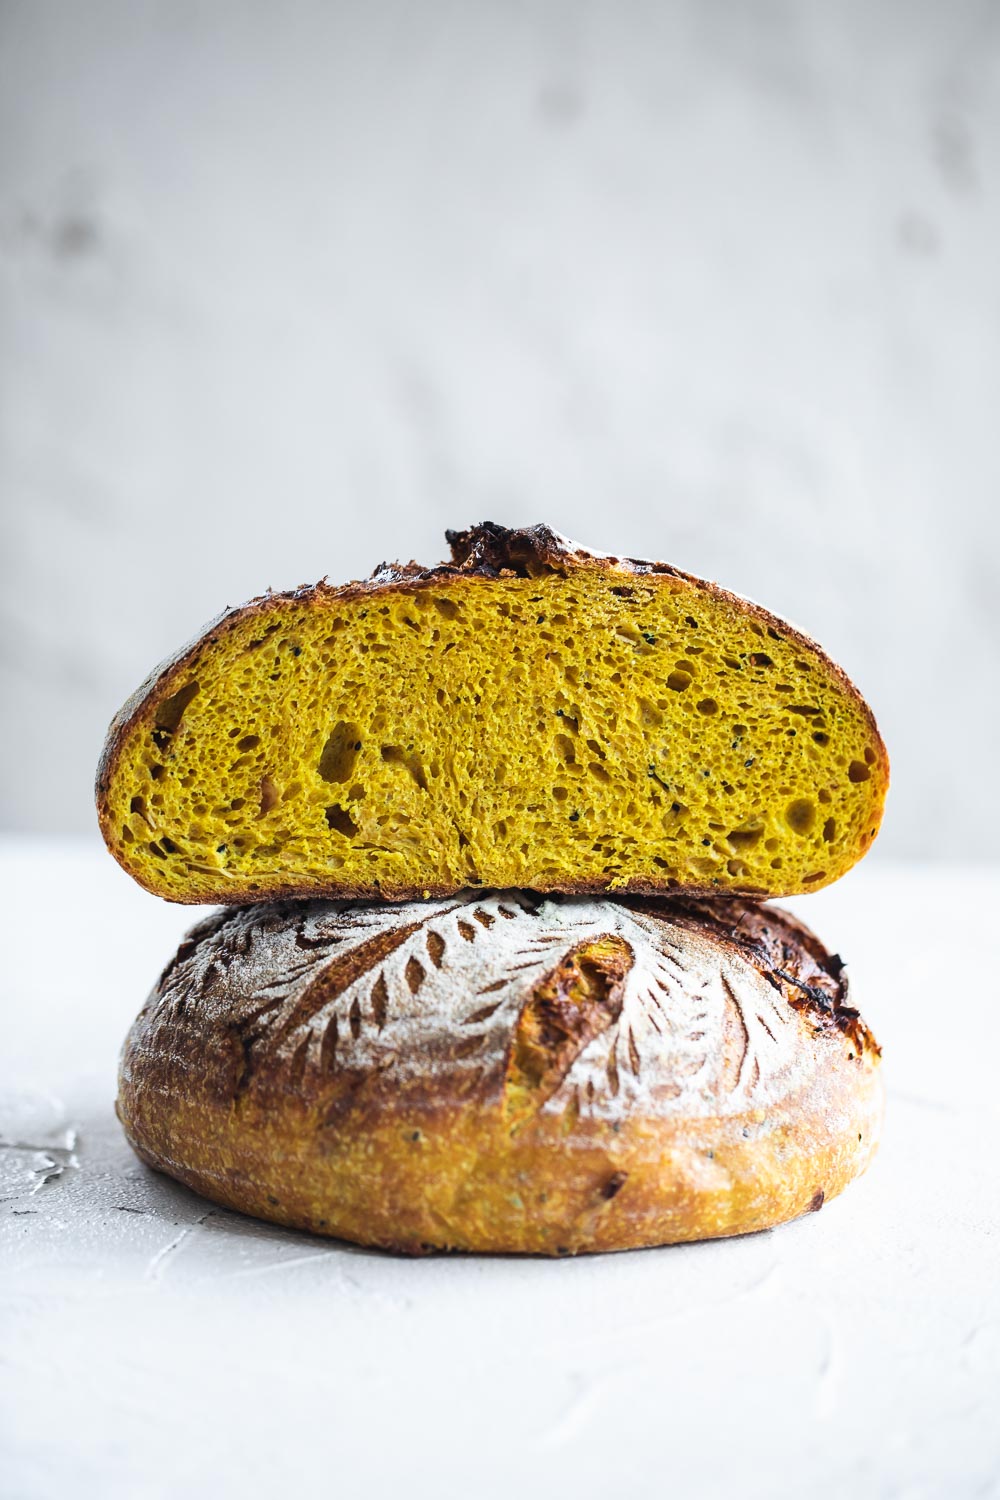
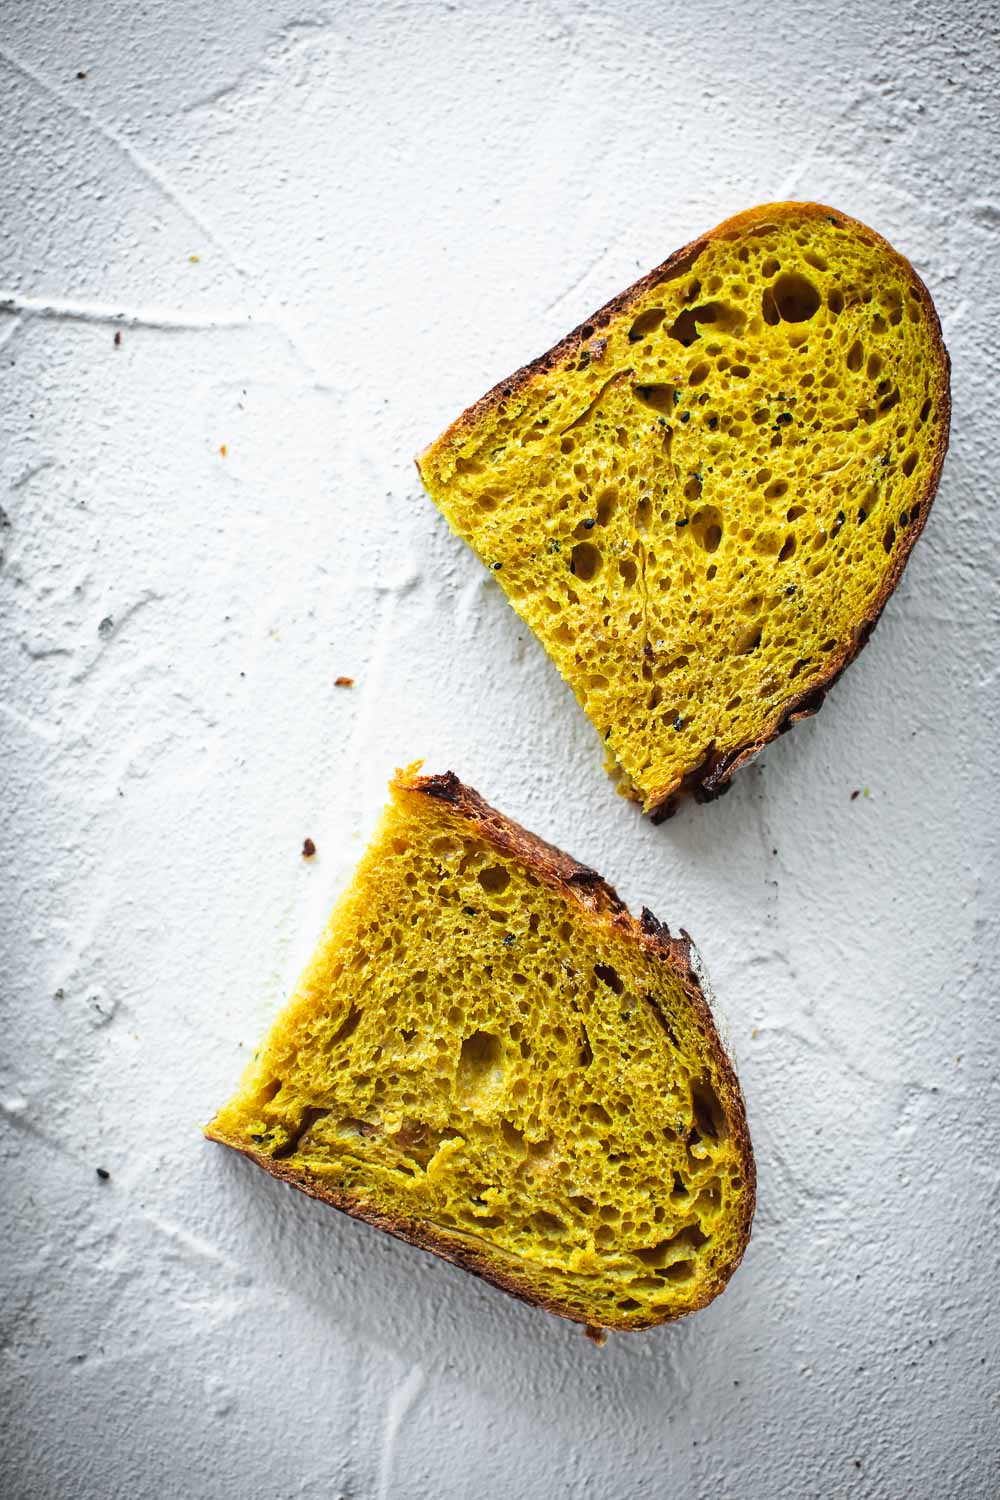
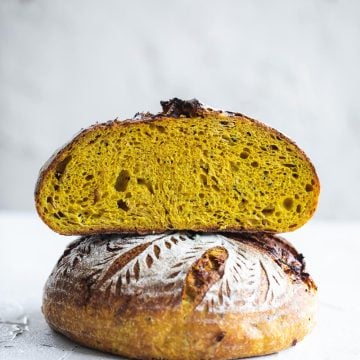
This Turmeric Sourdough With Caramelised Onion And Nigella Seeds has been deemed the best Sourdough ever baked by my family and my friends who have been on the receiving end of many loaves. I dare say, I have to agree. This golden yellow sourdough with a shattering crust and a soft, spongey, light and airy crumb is the best Turmeric Sourdough you will ever eat. Now, let me show you all my tips, tricks and techniques to make this near perfect turmeric sourdough - everything I have learned across 13 bakes of this loaf!
Creating The Perfect Turmeric Sourdough Flavour
I started phase two of my sourdough journey at the onset of lockdown here in Australia in March 2020. The first phase was about ten years ago and when it descended into madness (months of waking up at 4 am to bake a couple of loaves every day) and I had to stop to preserve my sanity. This time around, I took a more pragmatic approach. It also helped that the kids were much older. So, I started my sourdough journey by sharing this utterly useful and fun Sourdough Starter guide.
In the past six months, I baked many loaves and am inching very close to my 100th loaf. A couple of months in I got really comfortable with baking the infamous Potato And Rosemary sourdough (recipe coming soon!) - my first flavoured sourdough. When I felt I was ready to start experimenting with more flavours, I settled on turmeric. Turmeric is very heavily used in cooking in my home. We all love the earthy warmth of this beautiful golden spice. And I know for a fact that turmeric pairs really well with caramelised onion after having cooked these two as a base for many dry curries, Indian scrambled eggs and biryanis.
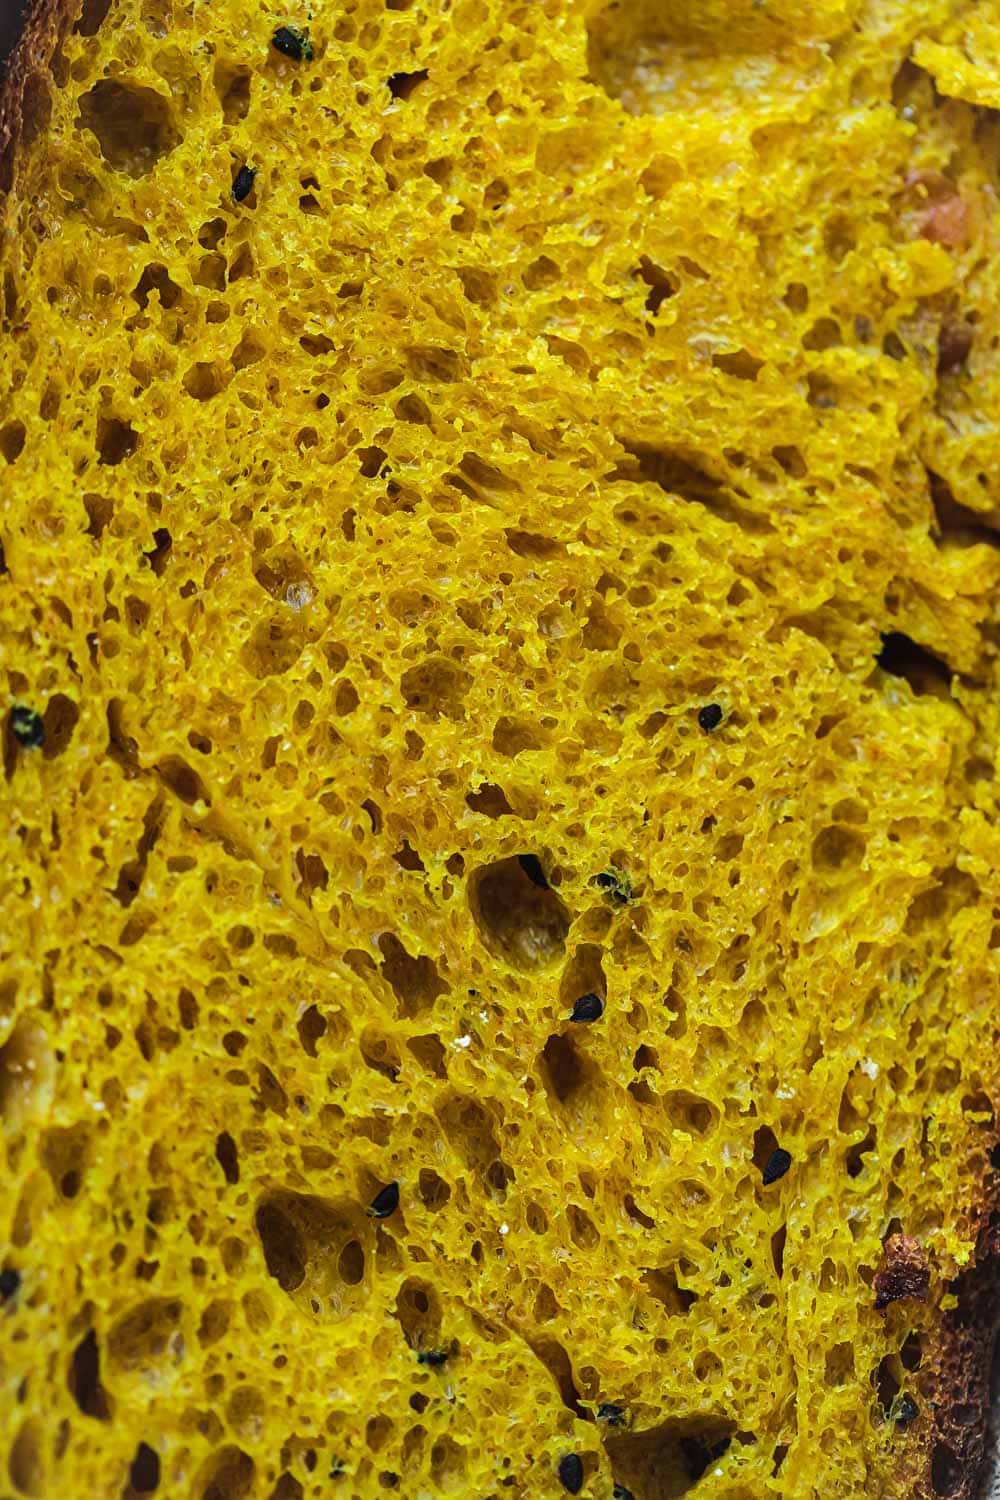
Further, drawing inspiration from Naan - the quintessential Indian bread; I decided to add nigella seeds which are often used as Naan toppers. The addition of nigella not only created an interesting crumb but imparted that beautiful aromatic flavour. Nigella seed commonly called kalonji in India is not to be confused with onion seed, although they are both very similar in appearance. It tastes a lot like oregano with that slightly bitter, minty, astringent after taste. It cuts through the sweetness of the caramelised onion perfectly and looks absolutely beautiful studded throughout the crumb of this sourdough.
Quick Look At My Steps To Baking This Turmeric Sourdough Bread
Day 1 - Refresh The Starter 3 times
Day 2 - Make Levain From the Refreshed Starter
Day 2 - Autolyse
Day 2 - Add Salt, Mix And Start Bulk Fermentation
Day 2 - Four Sets Of Four Coil Folds During Bulk Fermentation
Day 2 - Preshape
Day 2 - Final Shape
Day 2 - Cold Overnight Fridge Retard
Day 3 - Score And Bake
Using a Strong Active And Bubby Starter
As you read along, you will find many little nuggets of wisdom which if you adopt, will result in a turmeric sourdough with the most beautiful crumb. Have you seen the macro shot of the crumb yet? Isn't it just perfect? A lot of novice bakers fall into the impatience trap. The art of making sourdough requires a lot of patience and you have to give it the time and respect it needs. One of the first things to remember to do is to start with a very active and bubbly starter.
If your starter lives in the fridge, don't expect to bring it out and use directly in your dough. It is just not going to work. Think of your own self. You are not your best when you have just woken up. You would need a cup of coffee or green tea, a light jog, a quick shower and a nourishing breakfast to feel awake and alive to be your most productive. Imagine if someone shoved you into work the moment you slinked out of bed. That is exactly what your starter feels like when you bring it out from its cold fridge sleep.
My Starter Refresh Process
I pull my tiny starter out of the fridge and leave it in a warm spot for an hour to warm up. Then I start my Starter Refresh process.
Day 1 : 8am (Refresh 1)
I start two fresh jars - one for the bread that I will bake and the other to go back to sleep in the fridge for another day.
In each jar (I use Weck Jars), I add
- 25g of the cold starter
- 50g flour (I use 25g Organic Baker's White and 25g Organic Spelt)
- 50ml filtered warm water.
I mix contents of both jars well and leave them to rest in a warm spot with a lid loosely placed over the jars. After an hour when I start seeing tiny bubbles and some activity in the jars, I pop one of the jars in the fridge. This is my main starter that lives in the fridge. I let the other jar sit on the kitchen counter in a warm spot (or on a heat mat if it is winter) for 8 hours.
Day 1 : 2pm (Refresh 2)
I discard all but 25g of the starter in the jar. To the 25g starter, I add
- 50g flour (I use 25g Organic Baker's White and 25g Organic Spelt)
- 50ml filtered warm water.
Mix well, cover loosely with a lid and leave in a warm spot on the counter (or on a heat mat if it is winter) for 8 hours.
Day 1 : 10pm (Refresh 3)
I discard all but 25g of the starter in the jar. To the 25g starter, I add
- 50g flour (I use 25g Organic Baker's White and 25g Organic Spelt)
- 50ml filtered warm water.
Mix well, cover loosely with a lid and leave in a warm spot on the counter (or on a heat mat if it is winter) for 8 hours or until morning.
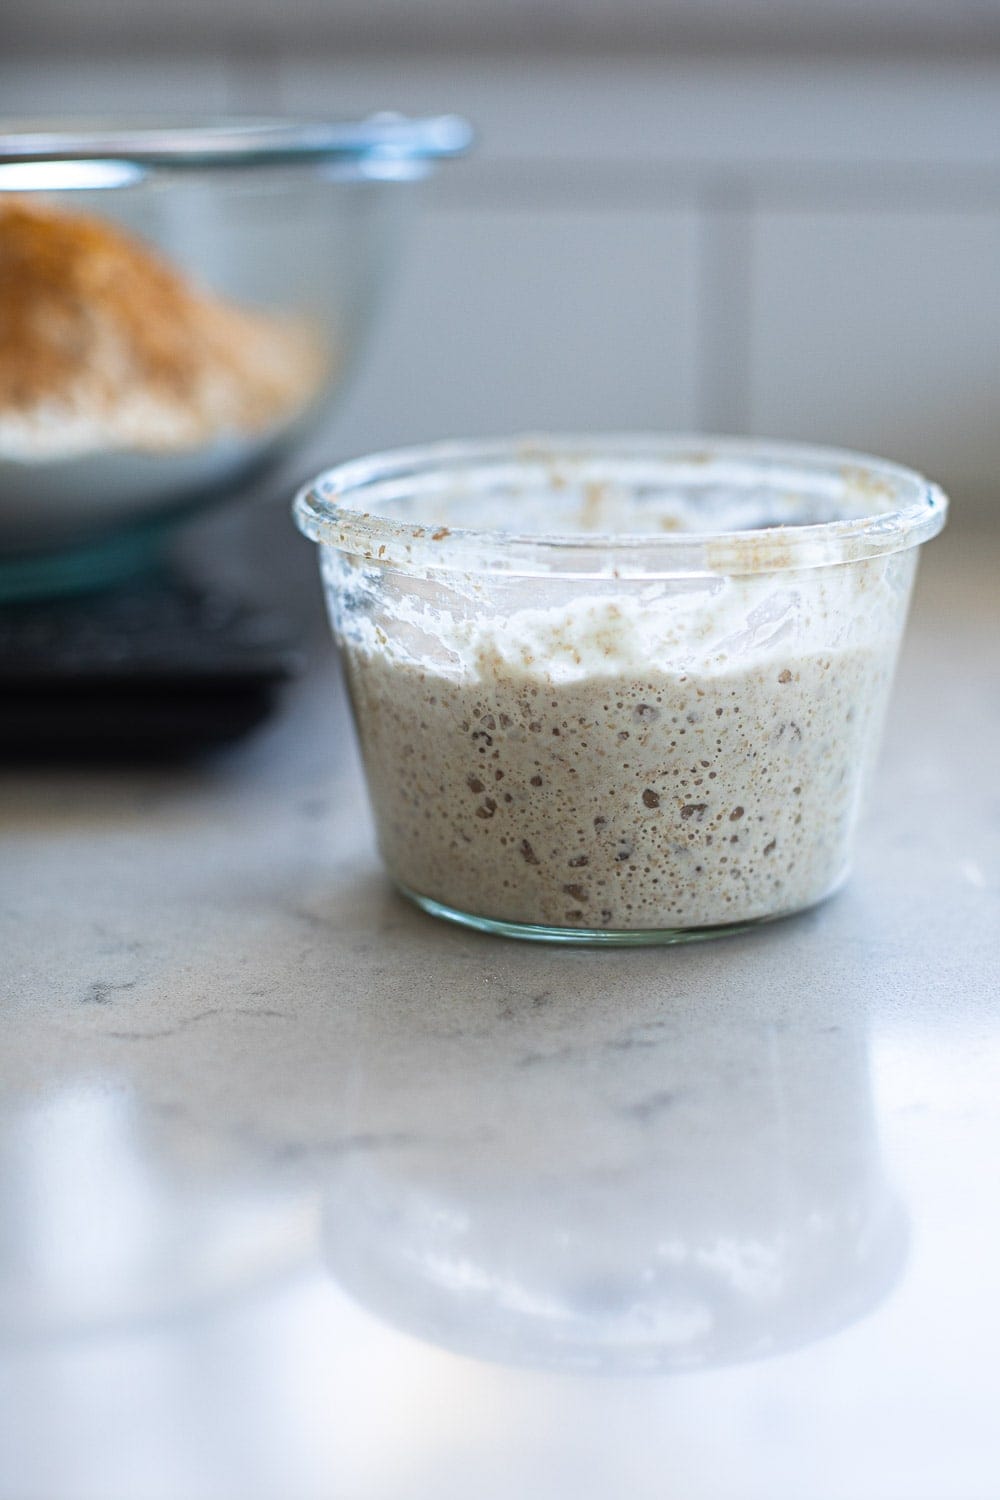
The starter will have come to life by this time, bubbling and being super active while doubling every four to five hours. If you can't do three refreshes, try and do at least two. I have found through experimentation that three refreshes make a huge difference to the final sourdough and the final bread is beautiful.
Levain Build And Tips For Mixing Sourdough
When a starter starts getting active and bubbly, it rises and doubles/triples in four to five hours. This is the point at which you want to use the starter in your dough. After this meteoric rise, the yeast activity slows down and the starter actually falls back down. And that is why on the day you want to mix your dough, you should make a Levain. A Levain is basically just the starter but a time-planned one that you can use in your dough at the perfect time when that starter is at its peak.
Day 2 / 7 am - Levain Build
To a fresh jar, add
- 25g of the refreshed starter
- 50g flour (I use 25g Organic Baker's White and 25g Organic Spelt)
- 50ml filtered warm water
Mix well, cover loosely with a lid and leave in a warm spot on the counter (or on a heat mat if it is winter) for 4-5 hours. At the end of this time period, your levain (starter) is ready to be added to the dough. This quantity creates 125g of levain (starter) for the dough. If you are baking more than one loaf, start more levain/starter jars and create 125g levain (starter) in each jar using your refreshed starter.
Day 2 / 12:00pm - Autolyse
Autolyse is the process of mixing the flour with water so the flour can absorb it and become hydrated. This starts the magical process of the protein in the flour to start with gluten development. The starch is getting broken down into sugars that will feed the yeast in the dough when it proves later. A much simpler explanation is this - the autolyse or the process of mixing the flour, starter and water creates a dough which is easier to handle and doesn't require a lot of kneading, thereby creating a lovely flavour and texture.
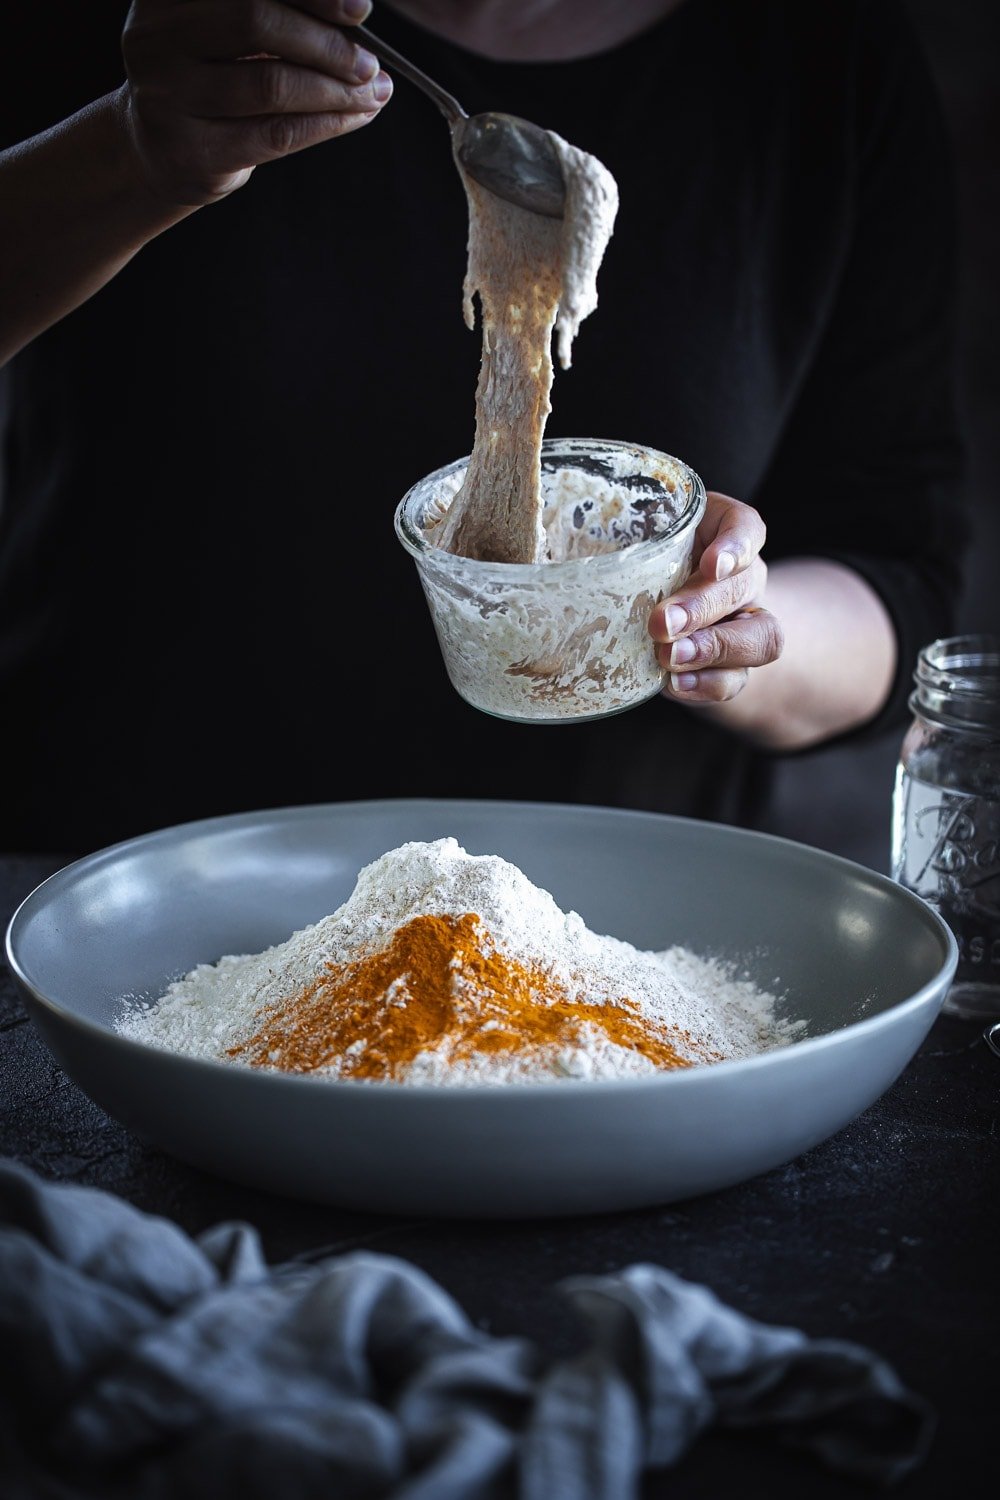
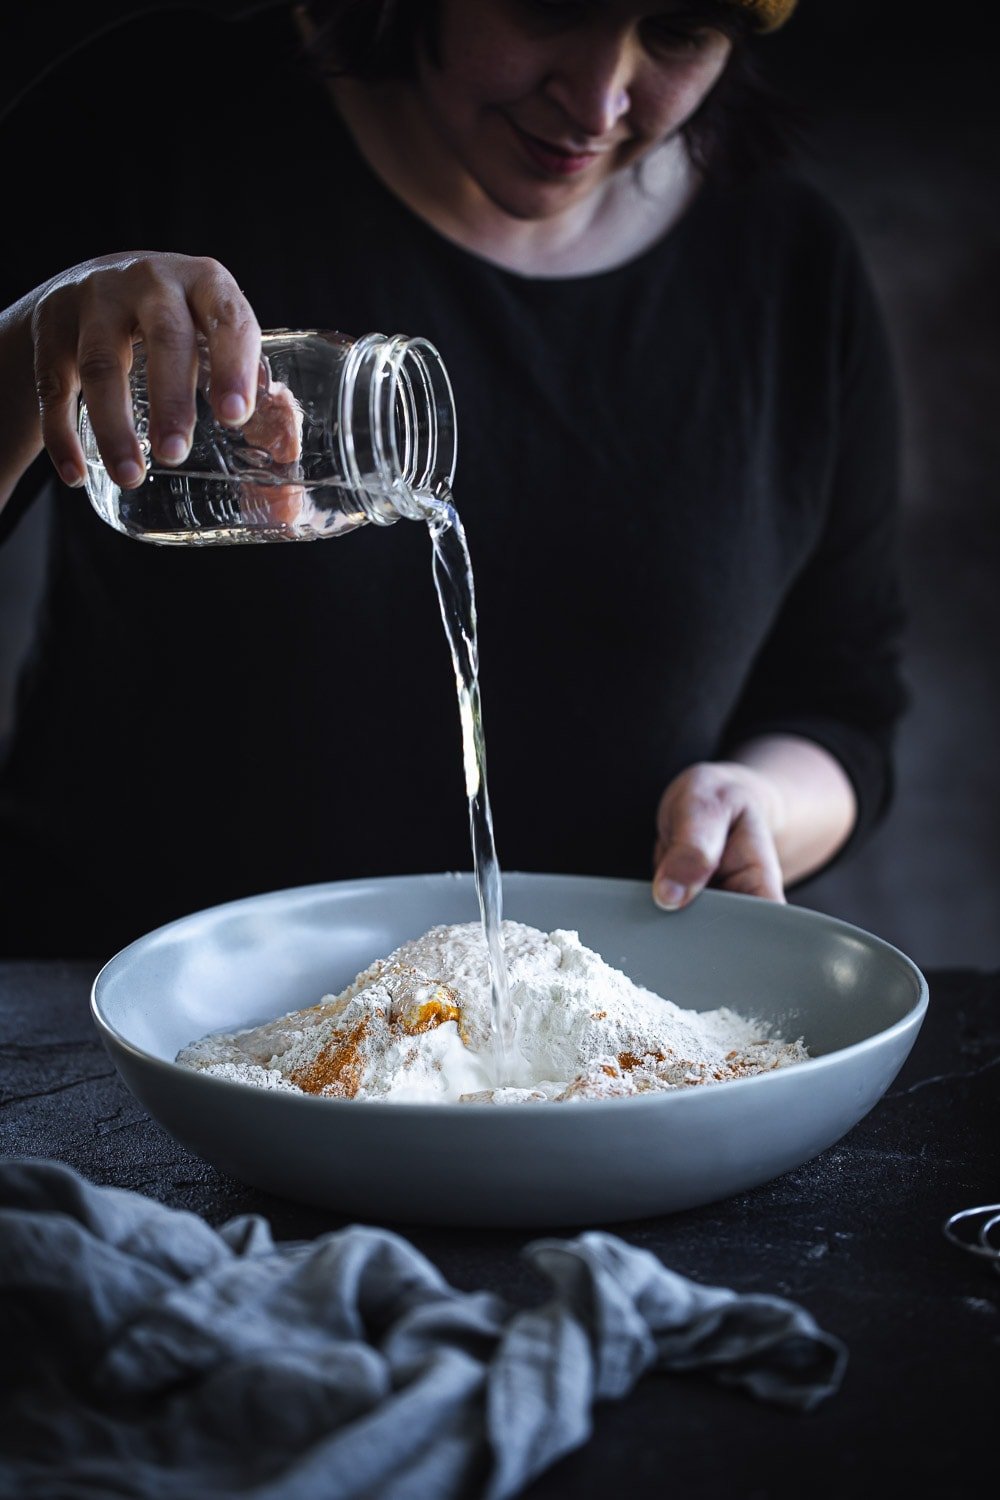
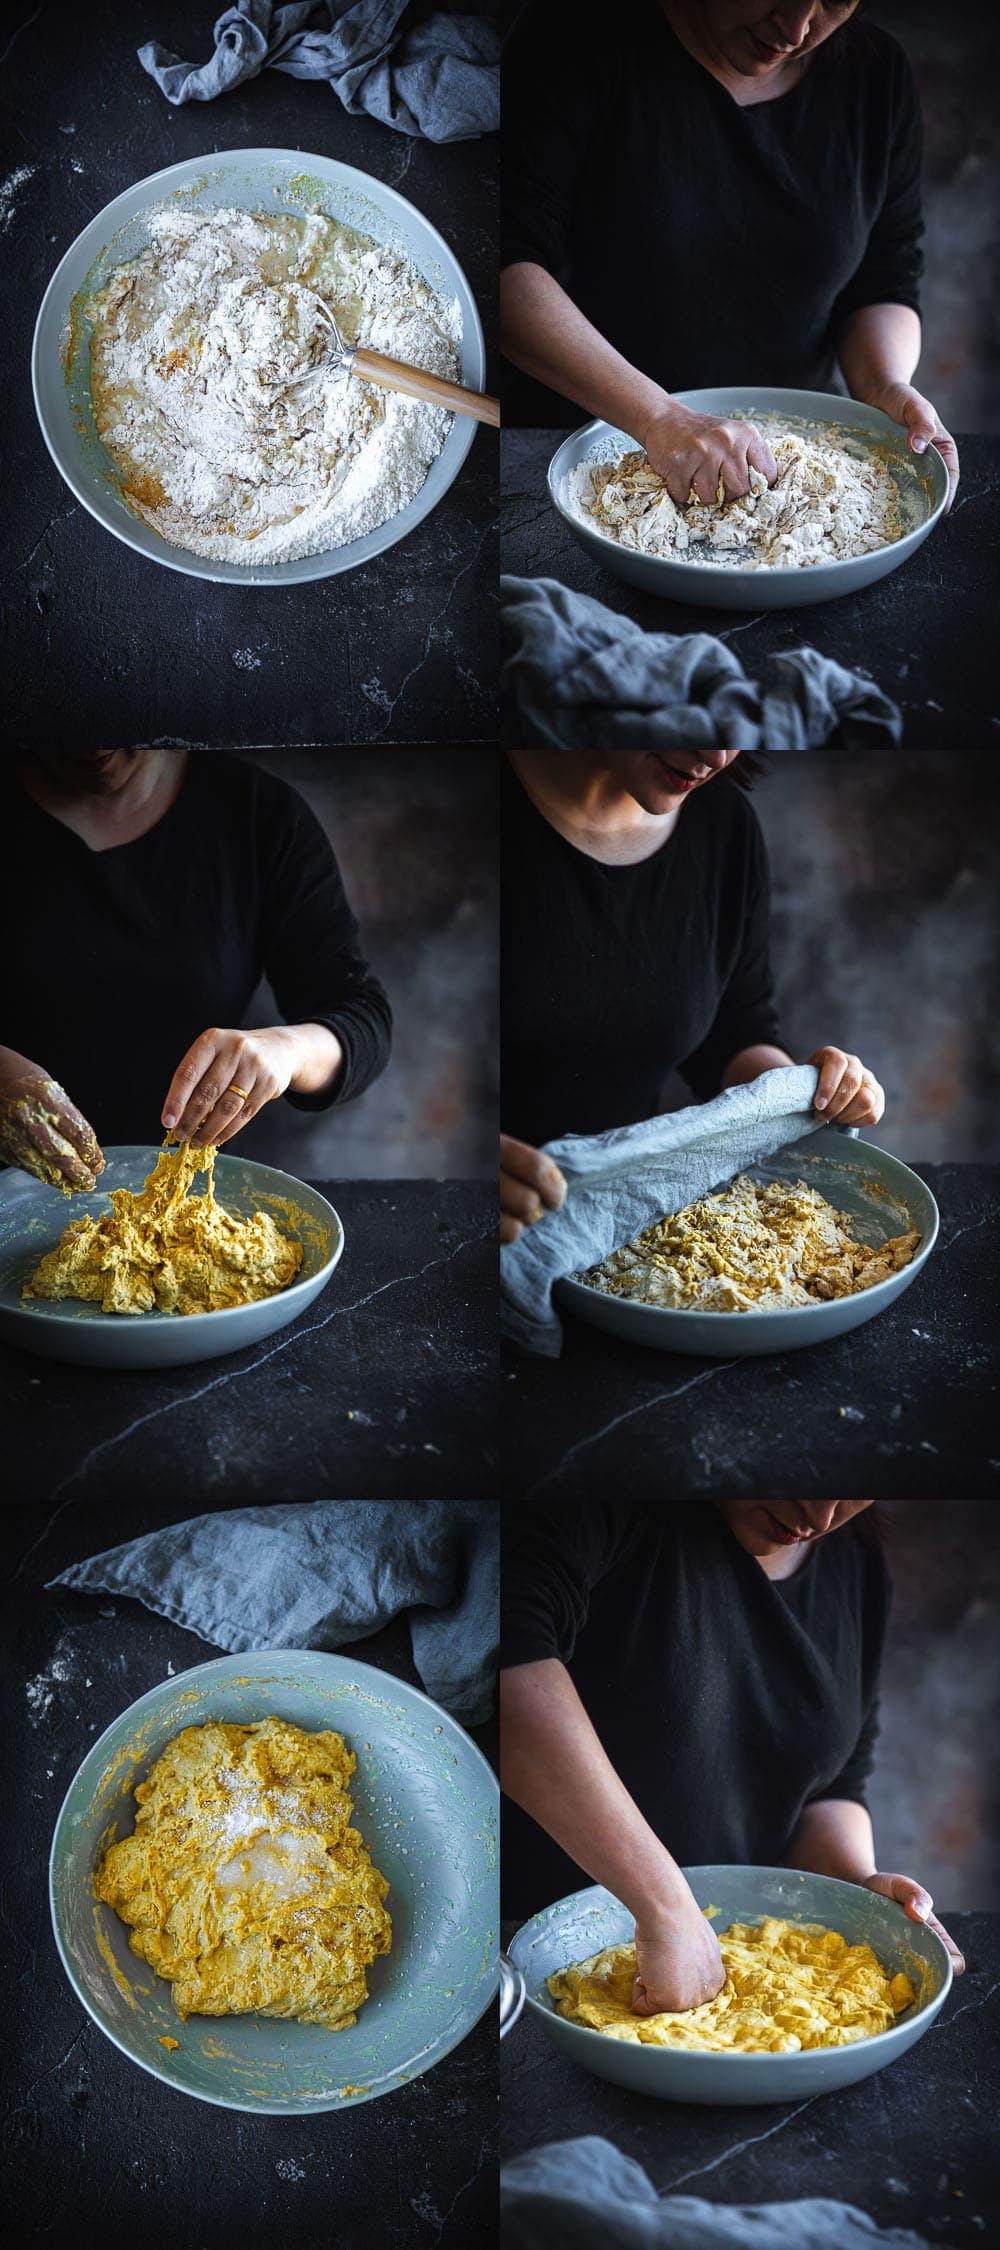
A lot of websites talk about resting the dough after autolyse from anywhere between 5 minutes to 5 hours. I do it for an hour. There isn't a lot of information about the actual mixing at this stage on the internet. From experimentation, I have found that you need to mix your dough for a good few minutes. Take your time, don't rush it. I spend about five whole minutes mixing the flour, starter, water and in this case- turmeric at this stage. I sometimes use a Danish dough whisk (pictured below) or my stand mixer with the dough hook and mix everything well for about 5 minutes till all the dry bits are wet and the dough is a shaggy mess. I then cover and let it rest for an hour.
This is what I am mixing in a wide (preferably shallow) bowl.
- 450g Organic Baker's White Flour
- 50g Organic Rye Flour
- 6g (1.5 teaspoons) ground turmeric
- 125g levain (starter)
- 350ml filtered warm water
Adding Salt And Bulk Fermentation With Coil Folds
Day 2 / 1 pm - Add Salt
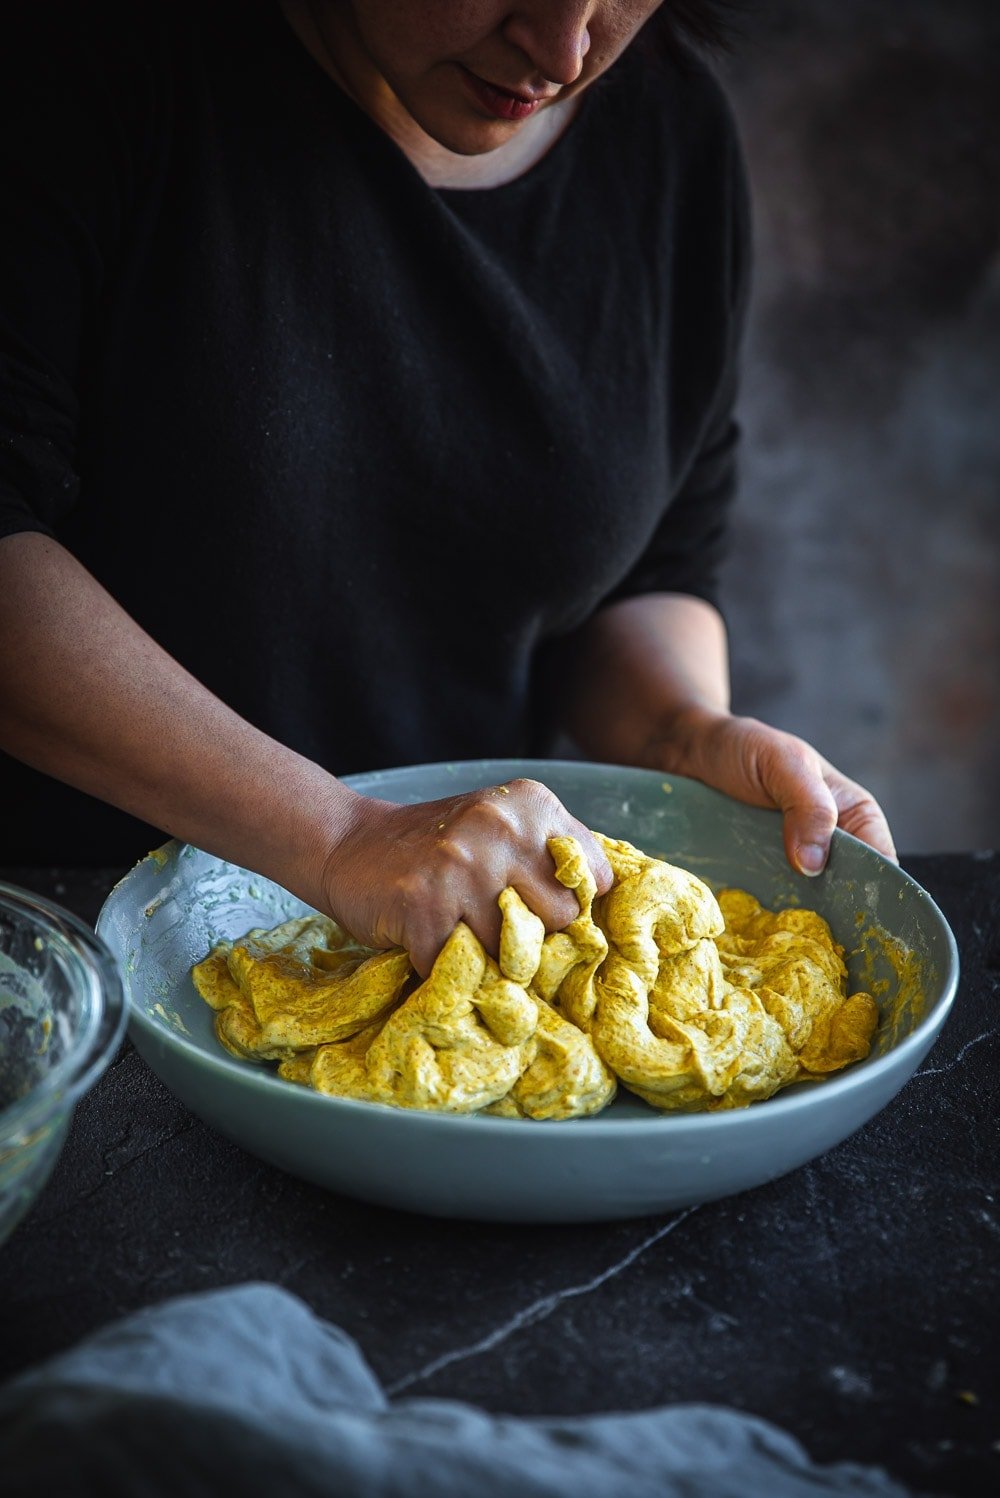
Add the below to the shaggy dough and mix using grasping/clenching motion with your palm until everything is incorporated. The dough will initially feel smooth, wet and stretchy. As you mix for a minute or so, it will start becoming less wet. Cover and leave for 5-10 minutes
- 10g sea salt flakes
- 20ml filtered warm water
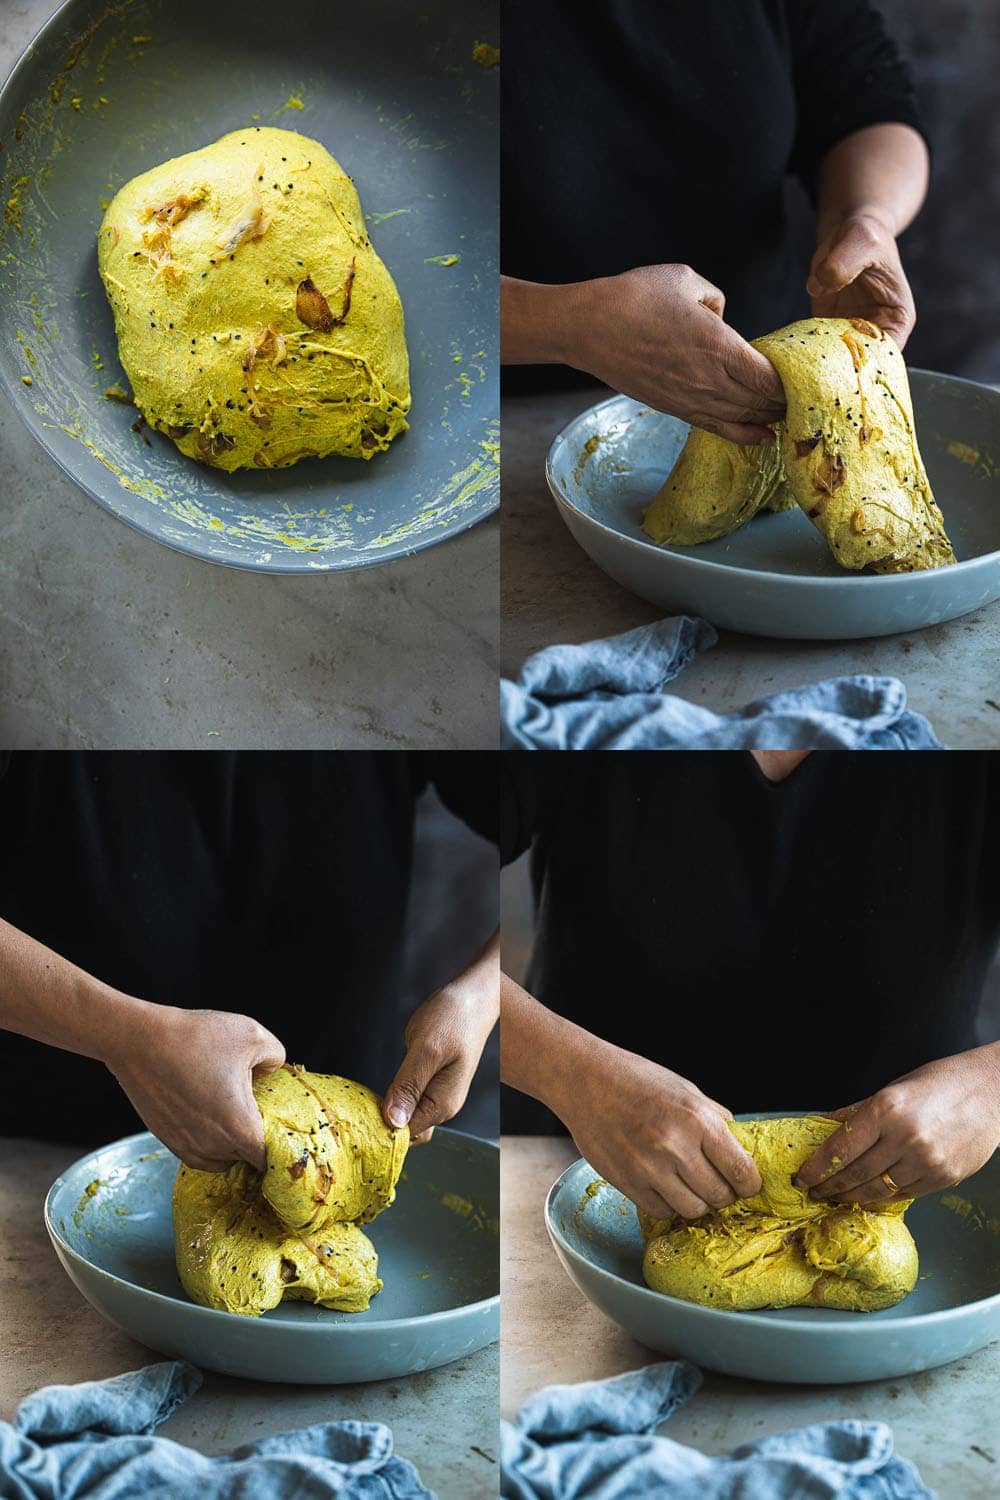
Day 2 / 1:10 pm - Coil Fold 1
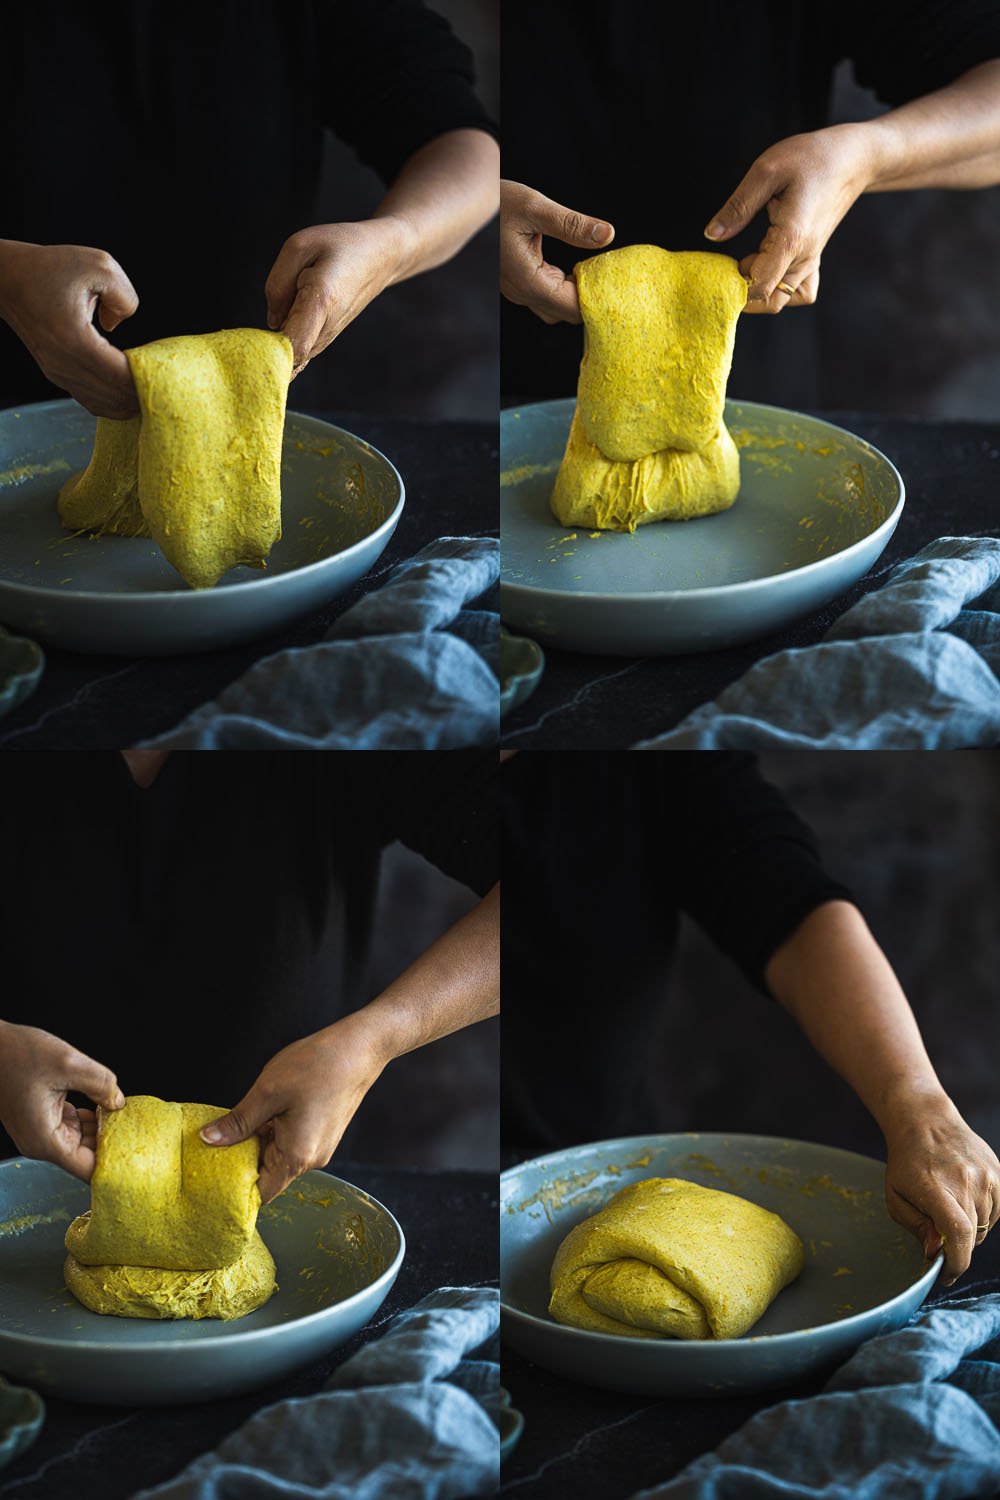
To perform the coil fold, wet your fingertips with water. Loosen the dough from the edges of the bowl. Lift the dough up from the middle, letting the front hang as you lift it. Then coil the front hanging bit into the dough, rolling it like you would roll a rug. Turn the bowl 90 degrees and repeat the coil fold. Do this a total of four times.
You will find the first coil fold to be super easy as the dough is nice and loose. As you continue coiling and folding, the dough starts to develop structure and become stiffer. To address this, I lift the dough in the middle, move my hands up so I am holding the top end of the dough. I then jerk the dough so that the weight of the hanging dough pulls it down and then coil the whole thing up like I am rolling a poster with the flat edge against my body.
Day 2 / 1:40 pm - Coil Fold 2
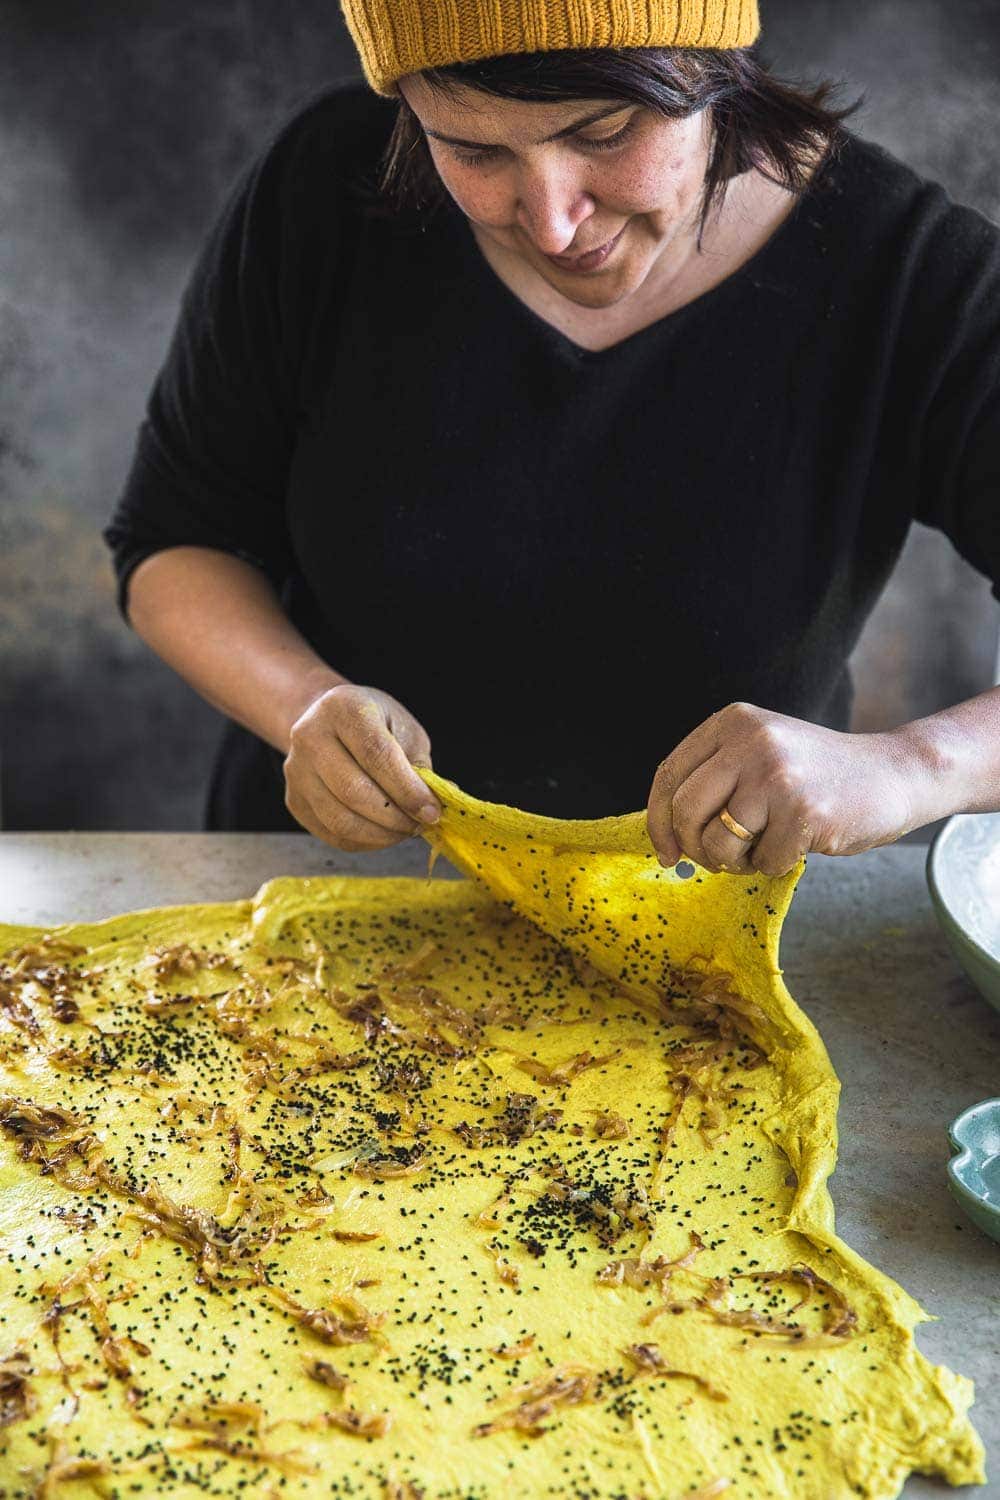
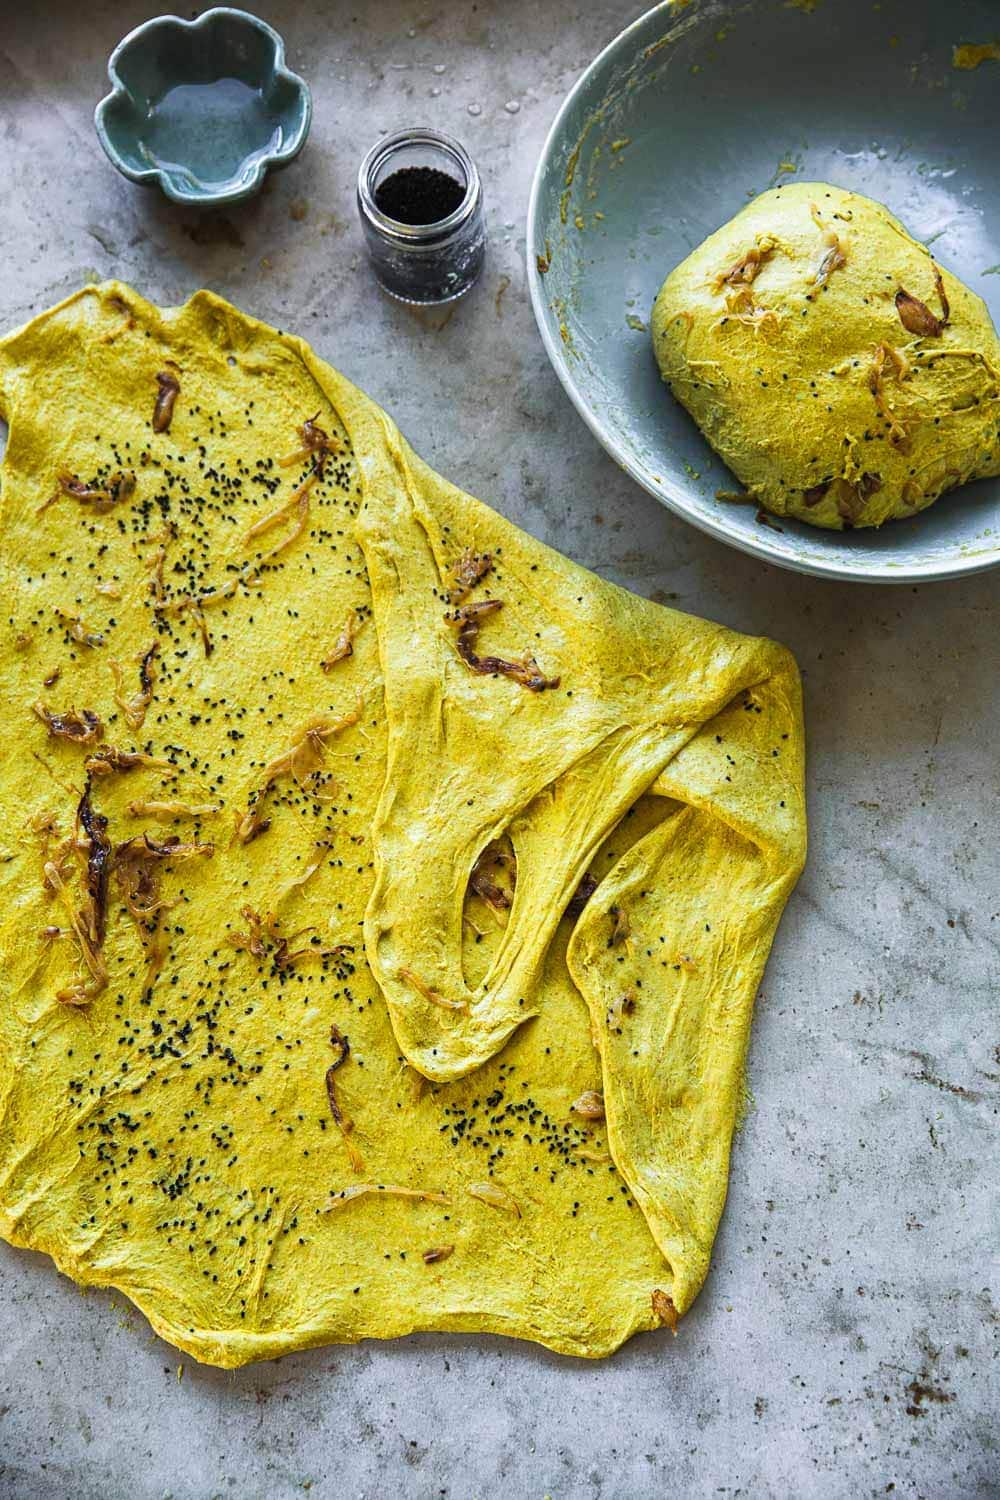
Day 2 / 2:10 pm - Lamination
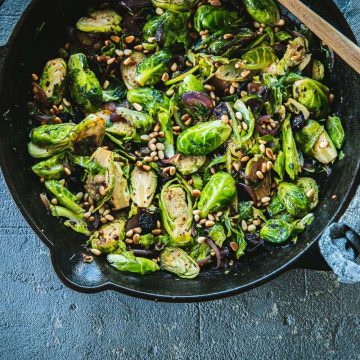
For this step, you will need to slowly caramelise the onions by adding the below to a pan on medium-low heat and cooking for 15 minutes while tossing constantly. And then cooling the caramelised onion top room temperature.
- 2 raw brown onions (200g) peeled, halved and thinly sliced
- 1 tablespoon butter or olive oil
You will also need
- 1 tablespoon nigella seeds
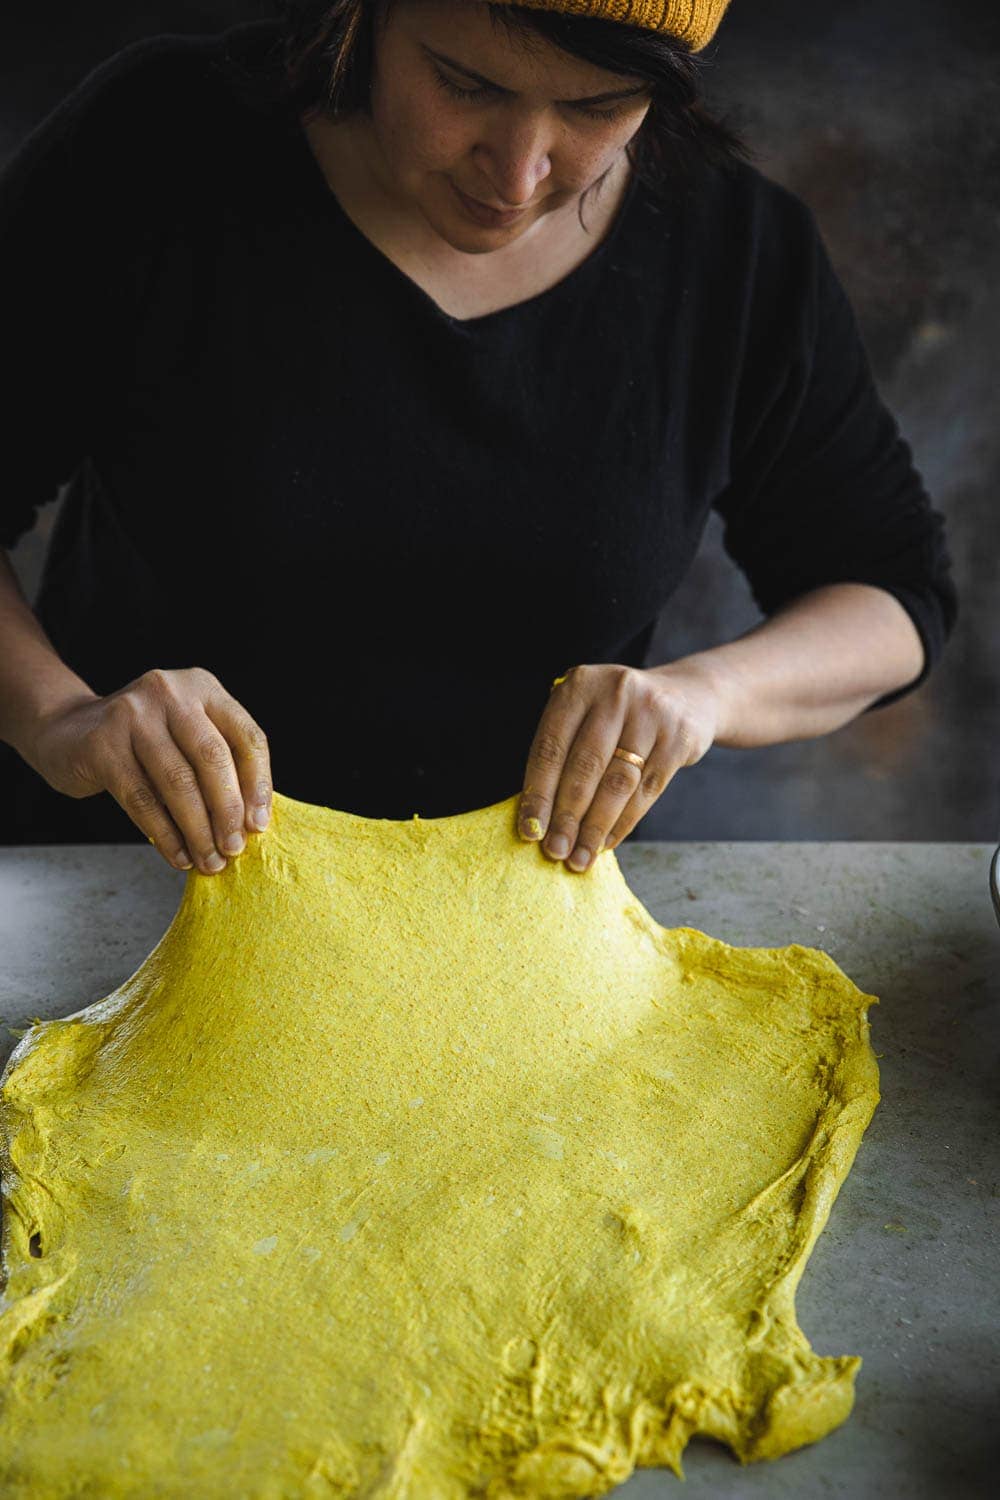
To laminate the dough, rub your benchtop with water. Place your dough in the middle and gently start stretching it outwards as thinly as possible without tearing. Spread onion evenly over the surface and scatter the nigella seeds. Start folding the dough in from the outer edges, overlapping the onion and nigella seeds to create many layers.
Day 2 / 2:30 pm - Coil Fold 3
Continue with your third set of coil folds. This one is the trickiest. Don't worry if your onion escapes and your dough tears. It will all come together in the last set of coil folds.
Day 2 / 3:00 pm - Coil Fold 4
Perform your final set of four coil folds. Your dough would have developed a lot in structure with many gas bubbles forming. Cover and rest for 2 hours.
Day 2 / 5:00 pm - Pre-Shape
To pre-shape the dough into a boule (round shape), sprinkle the sough in the bowl with some flour. Loosen the dough from the edges of the bowl, upturn the bowl and let the dough drop on your benchtop. Lightly stretch the dough in all four corns. Now gather an edge of the dough in a pinching motion and bring it into the centre. Repeat this eight to ten times till you have a circle that looks like a flower with all the edges meeting in the middle.
Using your bench scraper, flip the dough over so that the part with the edges meeting in the middle is now under. Using both your palms pull the dough towards you while turning it gently so that it starts forming a tight ball. Repeat this four to five times till you have a tight round ball. Cover with a tea towel and allow to rest on your benchtop for an hour.
Day 2 / 6:15 pm - Final Shape
Sprinkle a bannetone generously with rice flour. If you are lining your bannetone or a regular bowl with a tea towel, make sure you sprinkle that generously with rice flour.
The dough would've relaxed and spread. Dust your fingertips with flour. Using both your palms pull the dough towards you while turning it gently so that it starts forming a tight ball. Repeat this four to five times, turning and tucking till you have a tight round ball. Using a large bench/dough scraper and the palm of your hand, gently lift the dough ball and place it rounded side down in the bannetone so that the seam side is up.
Cover and wrap well with a tea towel or large plastic bag. Rest on your benchtop for 20-30 minutes.
Day 2 / 6:35 pm - Place in fridge for overnight cold proofing for 12-15 hours
Day 3 / 8:00 am - Sourdough baking
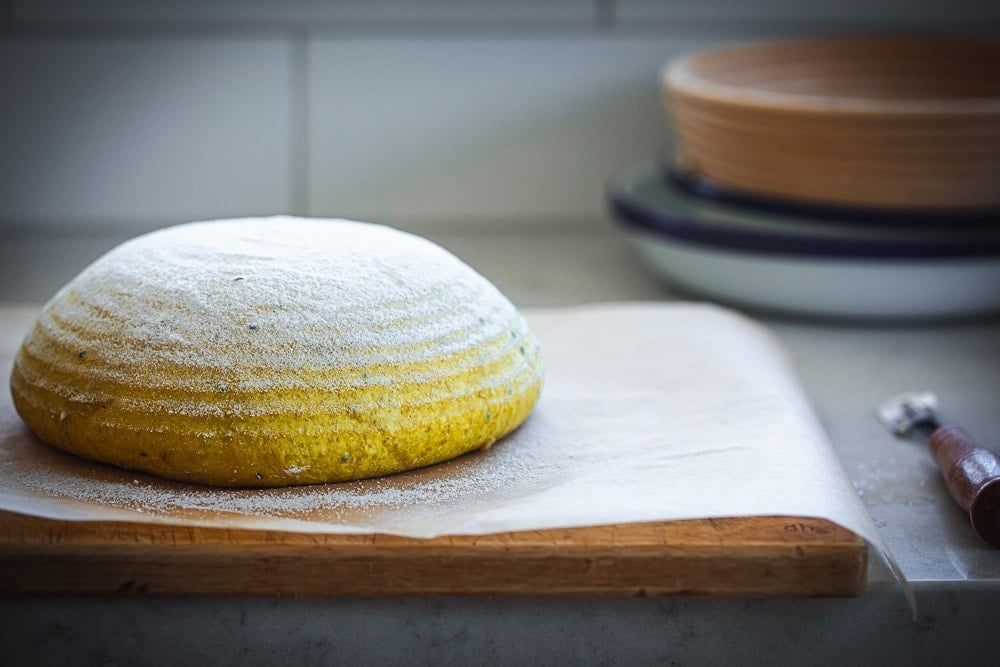
At 8:00 am I start by pre-heating my oven to its highest heat setting (250C). If using a cast iron pot (I have now successfully used the Challenger Bread Pan and the Lodge Combo Cooker With Helper Handle) or a Dutch oven or a ceramic baking cloche, I place it in the oven to pre-heat. I pre-heat for 30 minutes. At 8:30 amm, I bring my dough out of the fridge. I remove the tea towel/plastic bag. I place a baking paper over a chopping board and place that (baking paper side down) on top of the bannetone and then flip it over to bring my dough on the chopping board as seen below.
Score your dough using swift strokes. Lift the baking paper to place your dough in the hot pan. Add an ice cube or two. Cover and bake for 20 minutes at 240C. Take the lid of the pan off and bake uncovered at 225C for a further 20 minutes.
Remove from the oven and cool completely on a wire rack for 3-4 hours before slicing.
I hope you find this detailed post very handy when you bake your own Turmeric Sourdough Loaf. I would love to hear your feedback in the comments below. Please also feel free to ask any or many questions that you may have. Don't forget to tag me on Instagram @cookrepublic #cookrepublic when you share your loaves. I would love to see! Thanks! x
Recipe
Hungry For More Recipes? Subscribe to my FREE weekly cooking newsletter. Check out Instagram, Facebook, and Tiktok to see everything I share! And if you love exploring cooking techniques, discovering new cookbooks and want access to my exclusive veg-forward recipes, join my Best-Selling Substack!
Ingredients
- 450 g Organic Baker's Flour
- 50 g Organic Rye Flour
- 6 g ground turmeric
- 125 g ripe starter
- 370 ml filtered warm water
- 10 g sea salt flakes
- 200 g raw sliced brown onion
- 1 tablespoon butter or olive oil
- 1 tablespoon nigella seeds
Instructions
- 7:00 am LEVAIN BUILD - Build your levain by adding 25g refreshed starter, 50g Organic Baker's White Flour and 50ml filtered warm water to a jar and mixing well. Cover loosely with a lid and leave it in a warm spot (or on a heat mat during winter) to rise.
- 8:00 am CARAMELISED ONION - Heat a tablespoon of butter or olive oil in a wide cast iron pan. Add 200g of thinly sliced brown onion and cook over low heat for 20-25 minutes until golden and caramelized. Allow to cool to room temperature.
- 12:00 pm AUTOLYSE - Mix the Baker's Flour, Rye Flour and Turmeric in a wide shallow bowl. Add the starter and 350ml of the water. Use a Danish dough whisk to mix the dough into a shaggy mess for approximately 5-6 minutes. If using hands to mix, use a pinching motion for 5-6 minutes to mix the dough into a shaggy mess. Alternatively, you can use a stand mixer with the dough hook attached to mix the dough for 5-6 minutes. Cover and rest for an hour
- 1:00 pm ADD SALT - Add the salt and the remaining 20ml of water to the dough. Mix using grasping/clenching motion with your palm until everything is incorporated. The dough will initially feel smooth, wet and stretchy. As you mix for a minute or so, it will start becoming less wet. Cover and leave for 5-10 minutes
- 1:10 pm COIL FOLD 1 - To perform the coil fold, wet your fingertips with water. Loosen the dough from the edges of the bowl. Lift the dough up from the middle, letting the front hang as you lift it. Then coil the front hanging bit into the dough, rolling it like you would roll a rug. Turn the bowl 90 degrees and repeat the coil fold. Do this a total of four times.
- You will find the first coil fold to be super easy as the dough is nice and loose. As you continue coiling and folding, the dough starts to develop structure and become stiffer. To address this, I lift the dough in the middle, move my hands up so I am holding the top end of the dough. I then jerk the dough so that the weight of the hanging dough pulls it down and then coil the whole thing up like I am rolling a poster with the flat edge against my body.
- Alternatively, you can perform Stretch And Folds if you aren't comfortable with Coil Folds.
- 1:40 pm COIL FOLD 2 - Perform a second set of four Coil Folds (or Stretch And Folds if you prefer that).
- 2:10 pm LAMINATION - To laminate the dough, rub your benchtop with water. Place your dough in the middle and gently start stretching it outwards as thinly as possible without tearing. Spread onion evenly over the surface and scatter the nigella seeds. Start folding the dough in from the outer edges, overlapping the onion and nigella seeds to create many layers.
- 2:30 pm COIL FOLD 3 - Continue with your third set of coil folds (or stretch and folds). This one is the trickiest. Don't worry if your onion escapes and your dough tears. It will all come together in the last set of coil folds.
- 3:00 pm COIL FOLD 4 - Perform your final set of four coil folds (or stretch and folds). Your dough would have developed a lot in structure with many gas bubbles forming. Cover with a tea towel and rest for 2 hours.
- 5:00 pm PRESHAPE - To preshape the dough into a boule (round shape), sprinkle the dough in the bowl with some flour. Loosen the dough from the edges of the bowl, upturn the bowl and let the dough drop on your benchtop. Lightly stretch the dough in all four corns. Now gather an edge of the dough in a pinching motion and bring it into the centre. Repeat this eight to ten times till you have a circle that looks like a flower with all the edges meeting in the middle.
- Using your bench scraper, flip the dough over so that the part with the edges meeting in the middle is now under. Using both your palms pull the dough towards you while turning it gently so that it starts forming a tight ball. Repeat this four to five times till you have a tight round ball. Cover with a tea towel and allow to rest on your benchtop for an 30-60 minutes.
- 6:15 pm FINAL SHAPE - Sprinkle a bannetone generously with rice flour. If you are lining your bannetone or a regular bowl with a tea towel, make sure you sprinkle that generously with rice flour.
- The dough would've relaxed and spread. Dust your fingertips with flour. Using both your palms pull the dough towards you while turning it gently so that it starts forming a tight ball. Repeat this four to five times, turning and tucking till you have a tight round ball. Using a large bench/dough scraper and the palm of your hand, gently lift the dough ball and place it rounded side down in the bannetone so that the seam side is up.
- Cover and wrap well with a tea towel or large plastic bag. Rest on your benchtop for 20-30 minutes.
6:35 pm - Place in fridge for overnight cold proofing for 12-15 hours
- NEXT DAY BAKING / 8:00 am - Sourdough baking At 8:00 am I start by pre-heating my oven to its highest heat setting (250°C). If using a cast iron pot (I have now successfully used the Challenger Bread Pan) or a Dutch oven or a ceramic baking cloche, I place it in the oven to pre-heat. I pre-heat for 30 minutes. I then reduce temperature to 240°C. At 8:30 am, I bring my dough out of the fridge. I remove the tea towel/plastic bag. I place a baking paper over a chopping board and place that (baking paper side down) on top of the bannetone and then flip it over to bring my dough on the chopping board as seen below.
- Score your dough using swift strokes. Lift the baking paper to place your dough in the hot pan. Add an ice cube or two. Cover and bake for 20 minutes at 240°C. Take the lid of the pan off and bake uncovered at 225°C for a further 20 minutes.
- Remove from the oven and cool completely on a wire rack for 3-4 hours before slicing.


Omg this bread is so good! You have sweet carmelized onions, tangy sourdough, and crunchy nigella seeds. I have never done coil folds before and I think it gave my bread a better rise. It even rose substantially in the fridge. This is my new favorite bread!
Thank you so much for this detailed recipe! I've been daunted to approach sourdough recipes even though I've been maintaining my starter, but your break-down makes it so approachable and I'm excited to try it!
This recipe looks amazing and my question is; what kind of flour do you use in your starter? Mine is currently all rye flour. Thanks from Texas!
I use unbleached baker's flour and rye.
I made this once and came out really good. When you say warm water, what temperature?
I warm up filtered water in the microwave for about 15-20 seconds. A little bit warmer than room temperature just to get the fermentation going.
Hi Sneh
This looks so delicious, I can’t wait to try. I’m up to Day 6 of creating my starter and it’s bubbling along nicely.
I’m wondering if when your mixing the levain by hand does the turmeric stain your hands? Also wondering if the turmeric would stain my cream constituted stone bench top when leaving it to proof for an hour?
Thanks!
Hi Lucinda! I have found that turmeric stains when it is in its concentrated powder form. So when I mix it with the flours initially when it is in its powder form, I use a dough whisk (even a long wooden spoon or balloon whisk will do). I continue stirring it with the dough whisk after adding the water and starter. When it is slightly incorporated, it is then that I use my hands to mix it. At this stage, it doesn't stain my hands at all. I have a Silestone (white marble look) benchtop. This is a constituted stone as well. And I find that working the turmeric dough on it (laminating, leaving to proof) doesn't stain it at all. If I drop turmeric powder on it though and leave it for a bit or turmeric powder in water, then it stains. But I bleach it and it comes right off.
Thanks Sneh.
Hope to give this recipe a try next week!